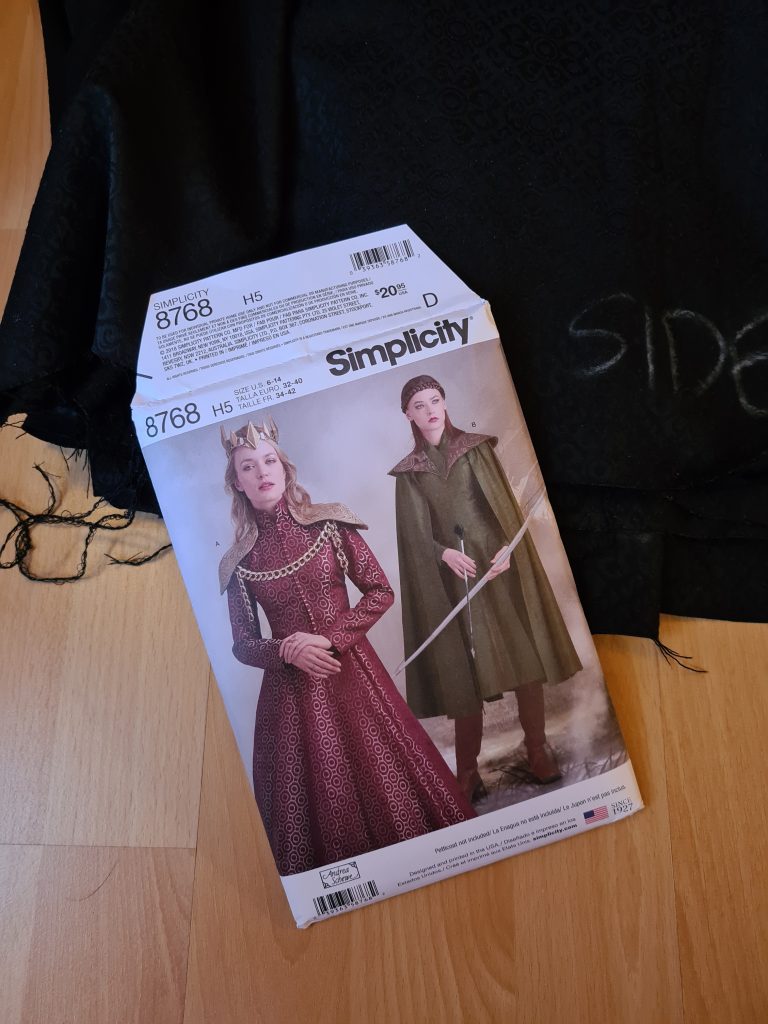
Commercial Pattern: Simplicity 8768
(with alterations)
Working Time: 10 Hours
Materials:
Jacquard Fabric in Black, 6m
Holey Jersey Fabric in Black, 1.5m
Accessories:
Yennefer’s Necklace (Etsy): 16 Euros
Total Cost: 104,13 Euros
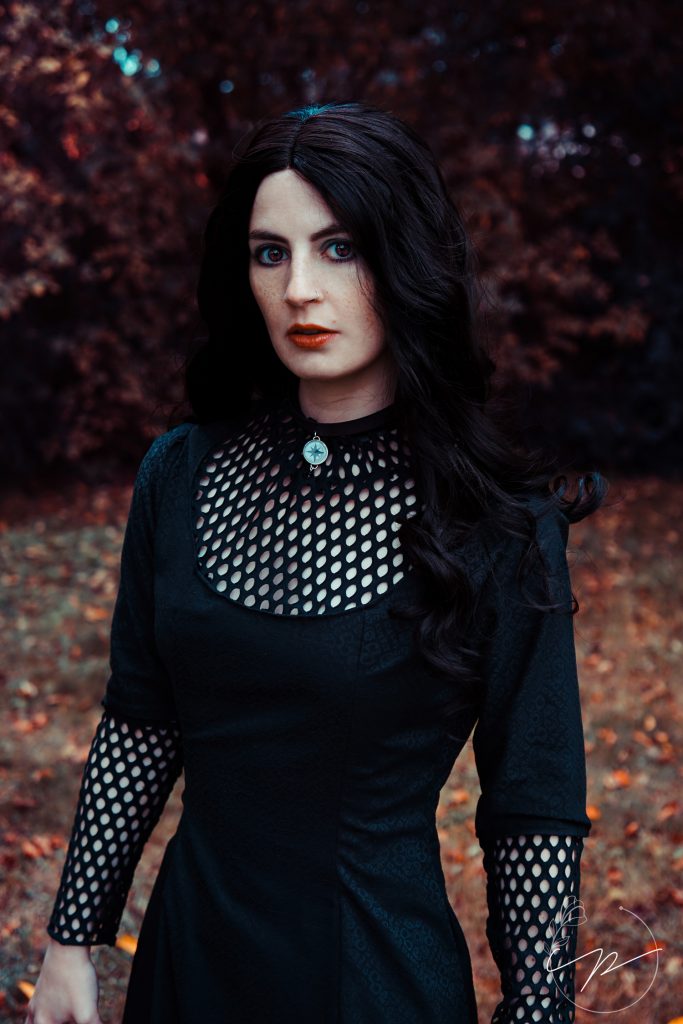
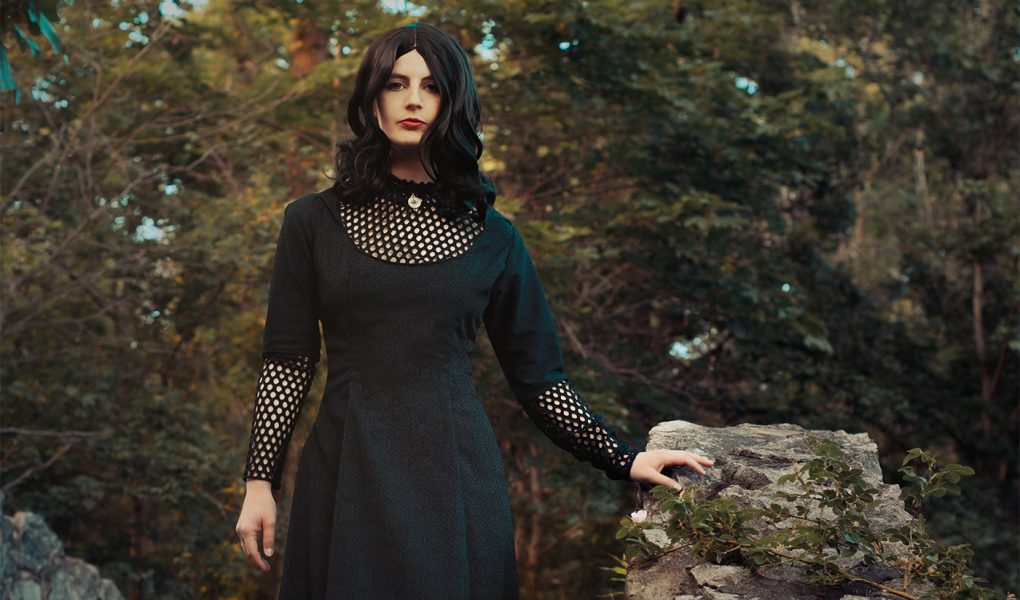
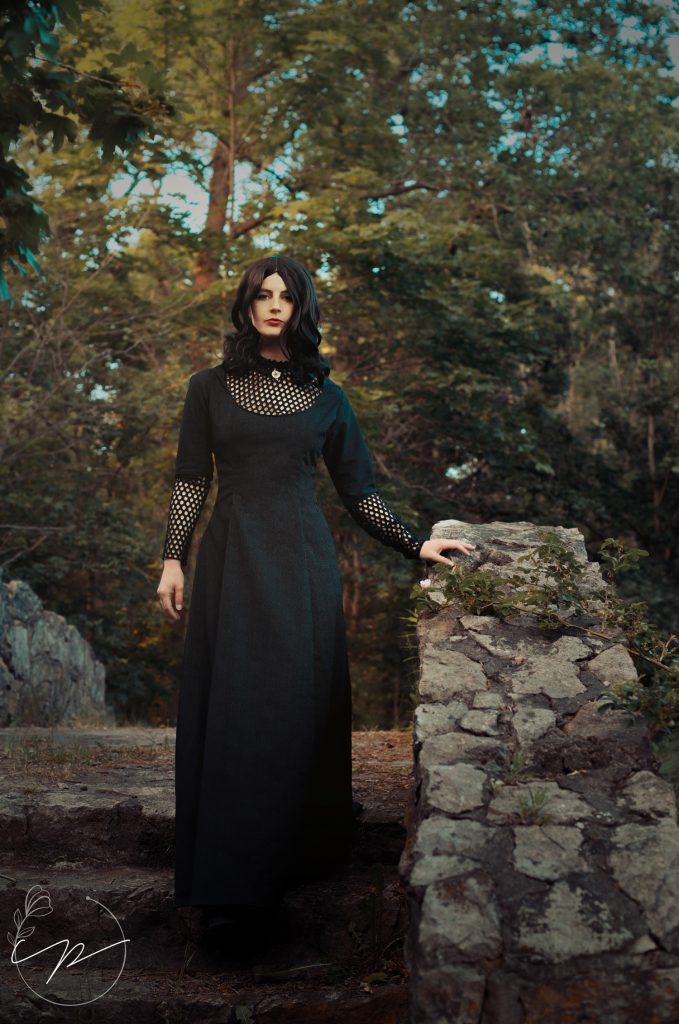
Even though I’d heard of The Witcher before the Netflix series came out and was therefore quite excited to watch it, I didn’t really know much about it until I actually watched the show and fell in love with the world and its characters. My cosplay loving fingers tickled immediately and I chose Yennefer of Vengerberg as my next project. While she’s wearing many, many wonderful outfits throughout the show, I settled on the dress she is seen wearing at the beginning of Bottled Appetites. Out of all her dresses, it seemed the most doable without either spending tons of money or time on it, but I took some liberty in recreating it. The original dress features a cut-out back. I debated for a very long time whether I was going to recreate it truthfully, but since I had no idea how to get into the dress once the back was cup open like that and I didn’t want to risk ruining the fabric, I decided against it and instead went for a plain back with a zip. After all, I hardly take cosplay photos of my back.
Choosing Fabric And Sewing Pattern For My Yennefer Dress
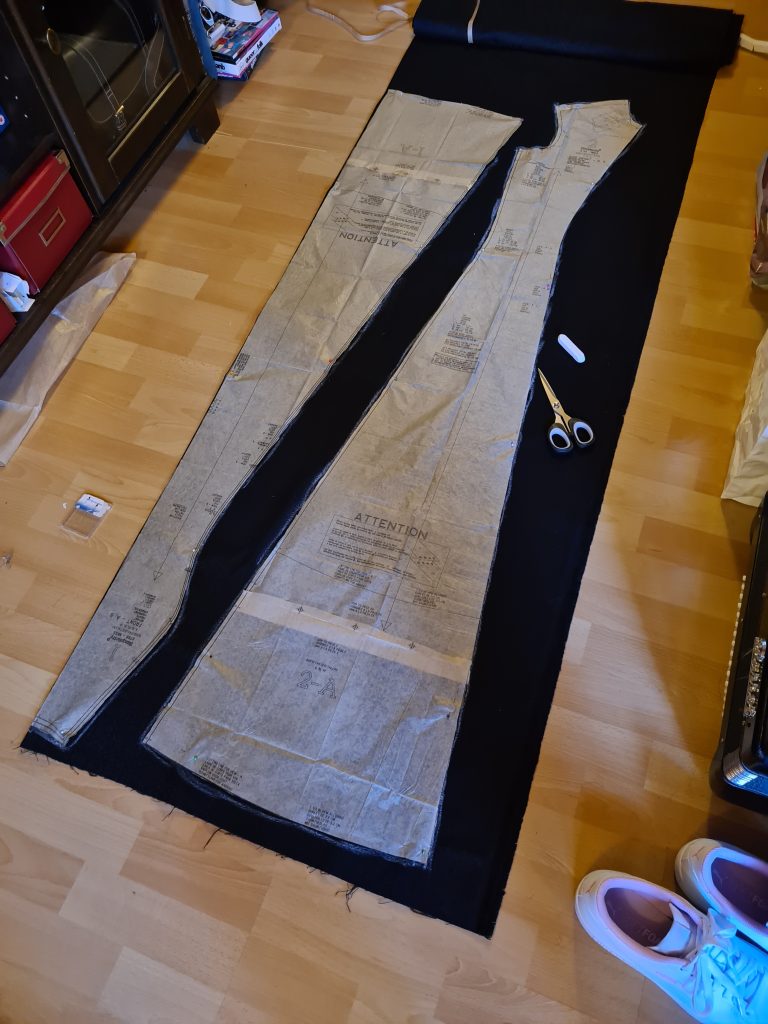
When the hunt for the pattern began, I soon realised that there was nothing closely resembling Yennefer’s dress, so I chose to use Simplicity 8768 and altered it. It suited my purpose quite well after all, because it came with the high collar I needed and the cut was roughly the same. The main thing I altered was to have the dress close in the back instead of the front, so whenever the pattern said “cut on fold” I did the exact opposite. By cutting the front piece on fold instead of the back, I had the opening that I needed for the zip.
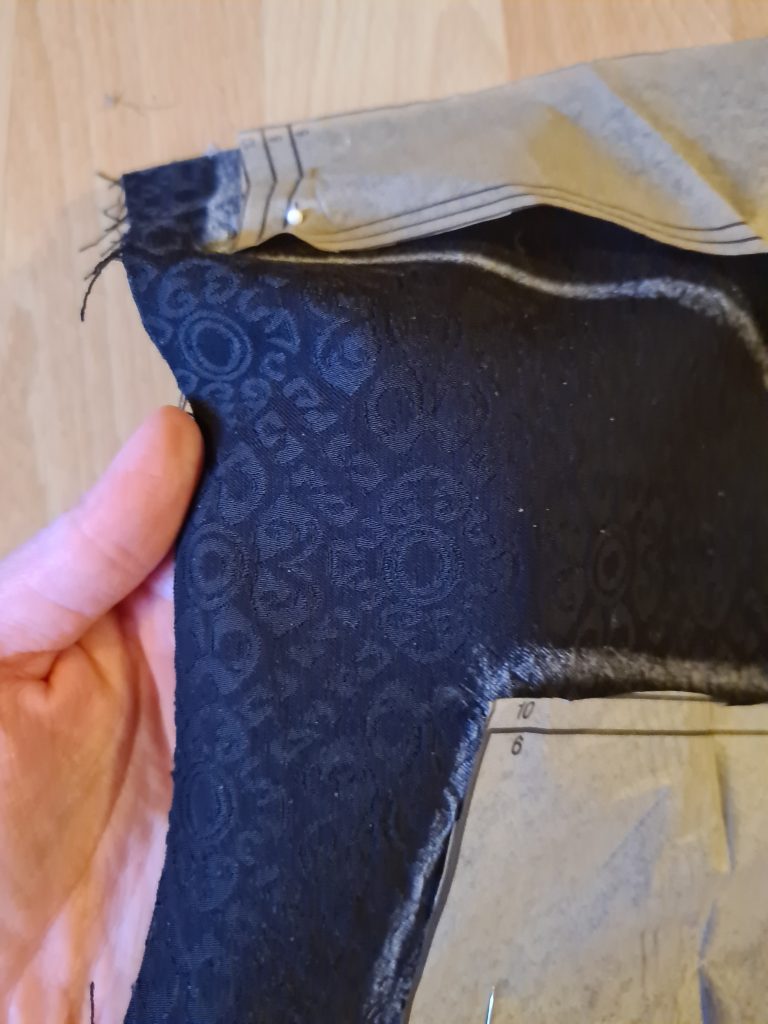
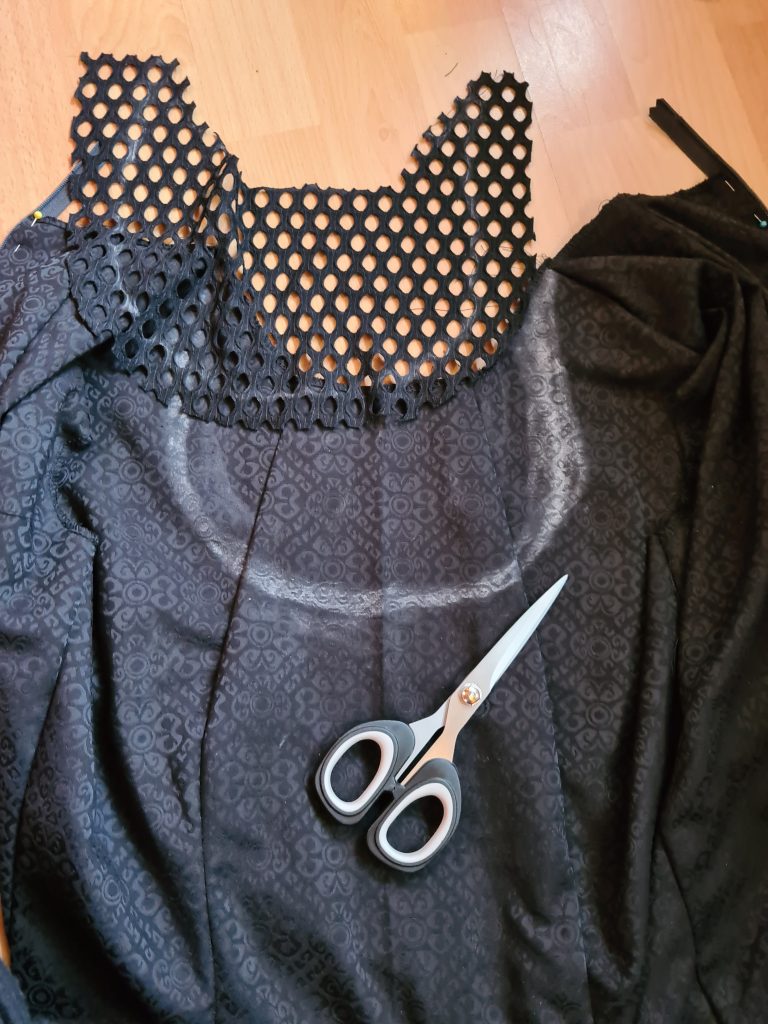
For the fabric, I chose a wonderfully patterned black fabric which looks so gorgeous in close-up pictures that I’m sad it never really shows up in full-body cosplay shots. The pattern is beautiful yet subtle and perfect for my Yennefer of Vengerberg cosplay as the original dress from the show had a similarly subtle pattern to it. The fabric for the cleavage/neck and lower arm area was more difficult to hunt down and I couldn’t find something that looked exactly like the original dress, so I settled on the simple holey fabric. I didn’t yet think about how I was going to add it to the dress and saved these worries for later 😀 I’ve since seen other cosplayers wearing this look and some chose transparent or nude fabric for the cut-out area and later embroidered it with black thread to recreate the holey look.
Now, Simplicity patterns are notoriously tricky when it comes to sizing and the measurements given on the pattern sleeve are not accurate. I went for a size UK10 which turned out much too big for me. One day I’ll learn my lesson, but that wasn’t the day, so the dress needed altering and adjusting until it fit me nicely. A fellow cosplayer and sewing enthusiast recently told me that Simplicity often adds 4 inches of wearing ease to their patterns which explains a f****** lot, so no wonder the patterns have never fit me right.
Creating the Yennefer Look
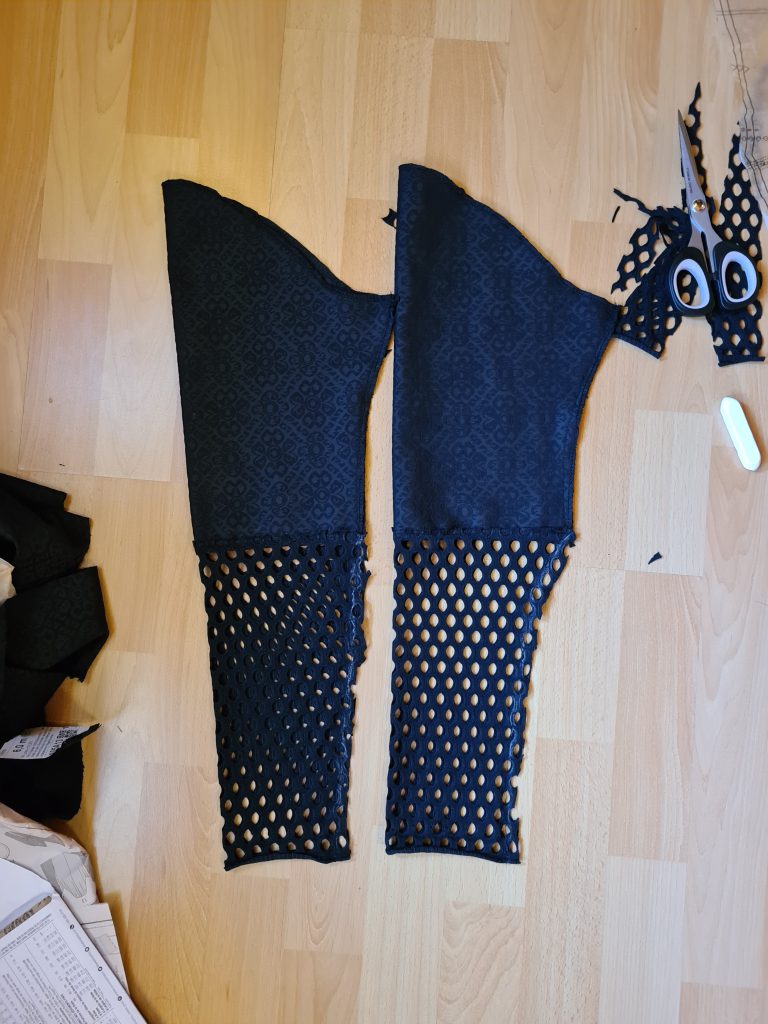
Then came the part that I had dreaded the most: cutting out a portion of the already put together dress to add the holey fabric. This included a lot of stress, sweating, cursing, nightmares and many chalk lines to find the perfect spot to cut. After removing the fabric, I cut the same shape out of the holey fabric and added the collar using the same fabric. Once I had sewn the pieces together, I was very happy to realise it fit and looked nice. However, since the holey fabric was very soft and didn’t hold up as well as the collar with added interfacing should have, I needed an idea. In the end, I used a black ribbon to tie it around my neck so it would stay in place. It’s not the most elegant solution, but it worked with the material that I had and keeps everything where it should be. In photos, the ribbon is barely visible.
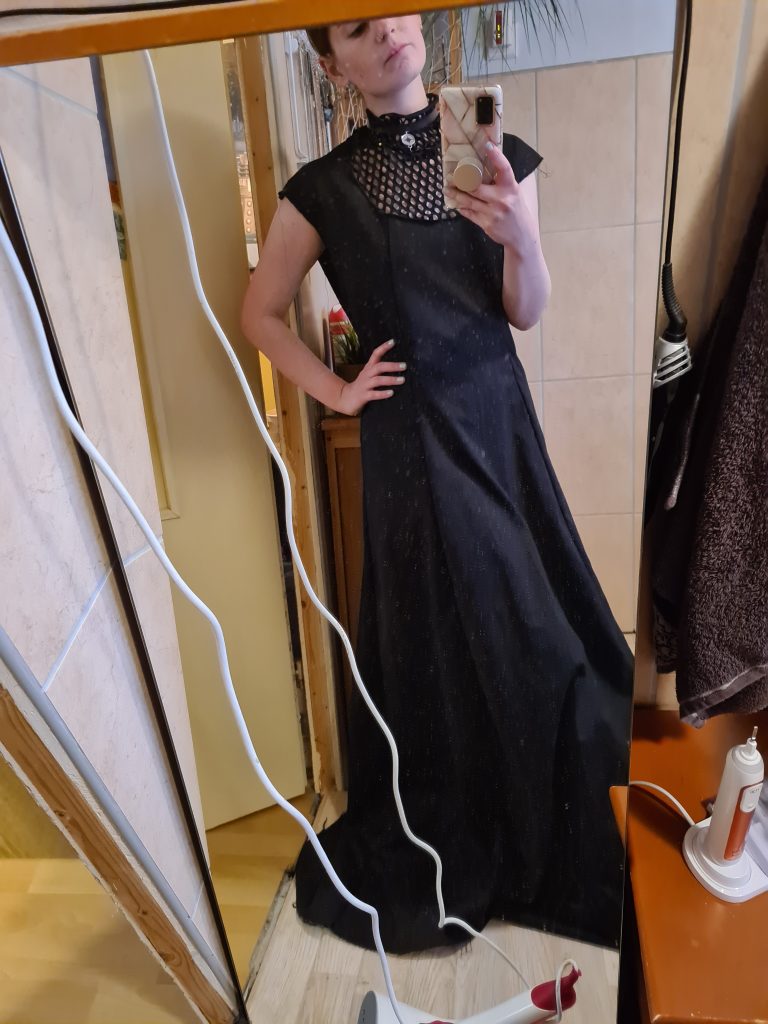
After that was done, I put in the zip and the main dress was finished. For the sleeves, I stuck close to the pattern, cut them out and adjust the fit until I was happy with the result. Then I once again made chalk lines along my elbows and just cut the sleeves in half to add the holey fabric. Once sewn together, I could add the sleeves to the dress. Now, all that remained was the hem which was quickly finished.


Finishing My Yennefer Cosplay
Due to the fact that I had to adjust the sizing of the dress a lot and also improvised with the holey fabric, my Yennefer of Vengerberg cosplay didn’t turn out exactly perfect, but I’m still quite proud of the dress and I love wearing it. It required me to get really creative with the pattern and materials that I could get my hands on to make it work and look like Yennefer, but I think that, overall, I did a good job on this one 🙂
If you’re interested in how I made Yennefer’s coat from Rare Species, look here.