Commercial Sewing Pattern: Simplicity 8768 (only as a base with many, many alterations)
Working Time: 17 Hours
Materials:
Silver Jacquard Fabric, 7m
Silver Piping, 20m
Yarn
Accessories:
Wig (Wish), 27 Euros
Brooch (Wish), 4 Euros
Total Cost: 95,38 Euros
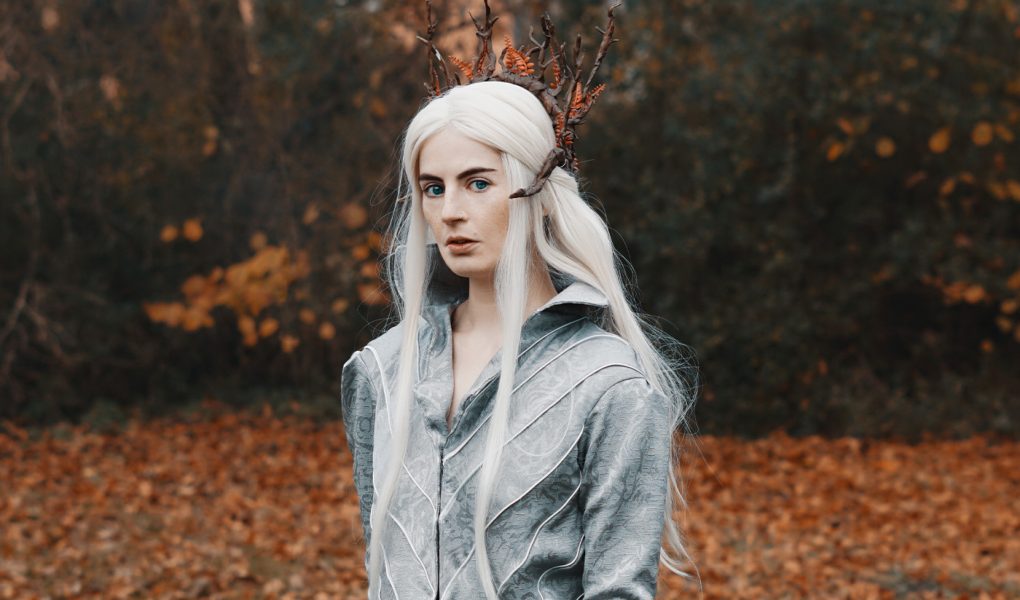
Planning Thranduil’s Mirkwood Costume
As a cosplayer, you might understand that watching or rewatching movies and TV shows can be quite dangerous. For instance, you’re just casually enjoying The Hobbit and suddenly your hand slips and you find yourself researching reference photos for a certain Elf King’s costume. Well, that’s what happened to me when I rewatched LotR and The Hobbit early in 2021. I already made Thranduil’s Mirkwood Crown back in spring and didn’t get around to the tunic until October/November 2021. To be entirely honest, I found the idea of this Thranduil cosplay incredibly daunting, so I kept postponing it. In the end, it was easier than anticipated and if you’re interested in how I did it, just read on.
Finding a Sewing Pattern for Thranduil
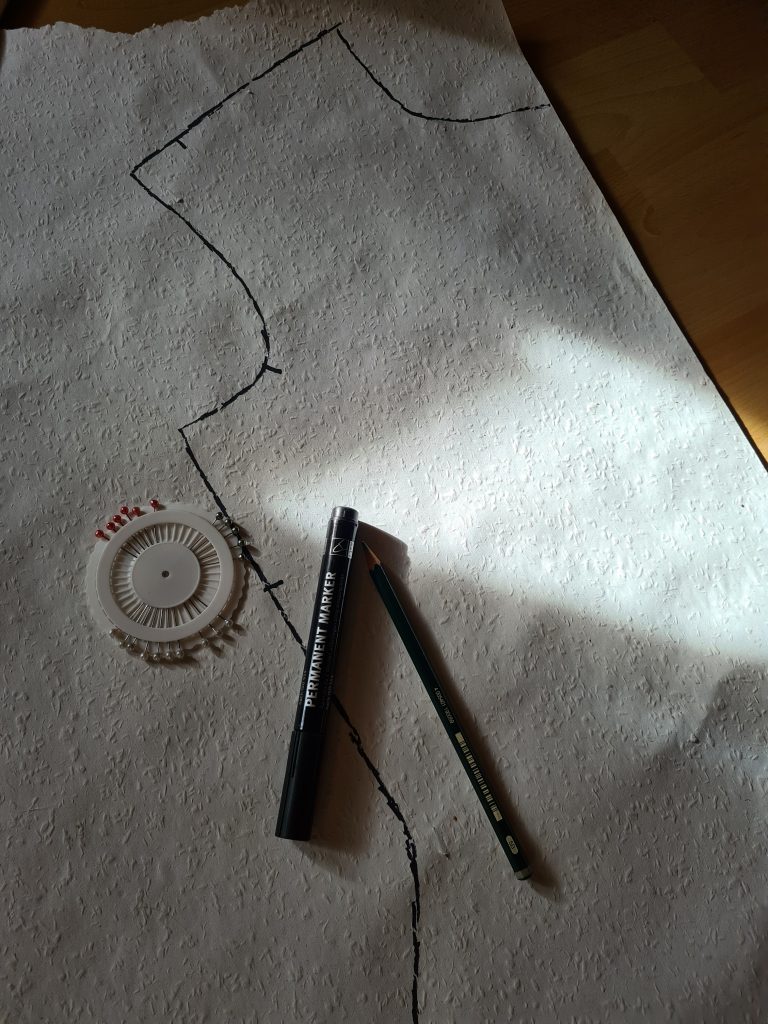
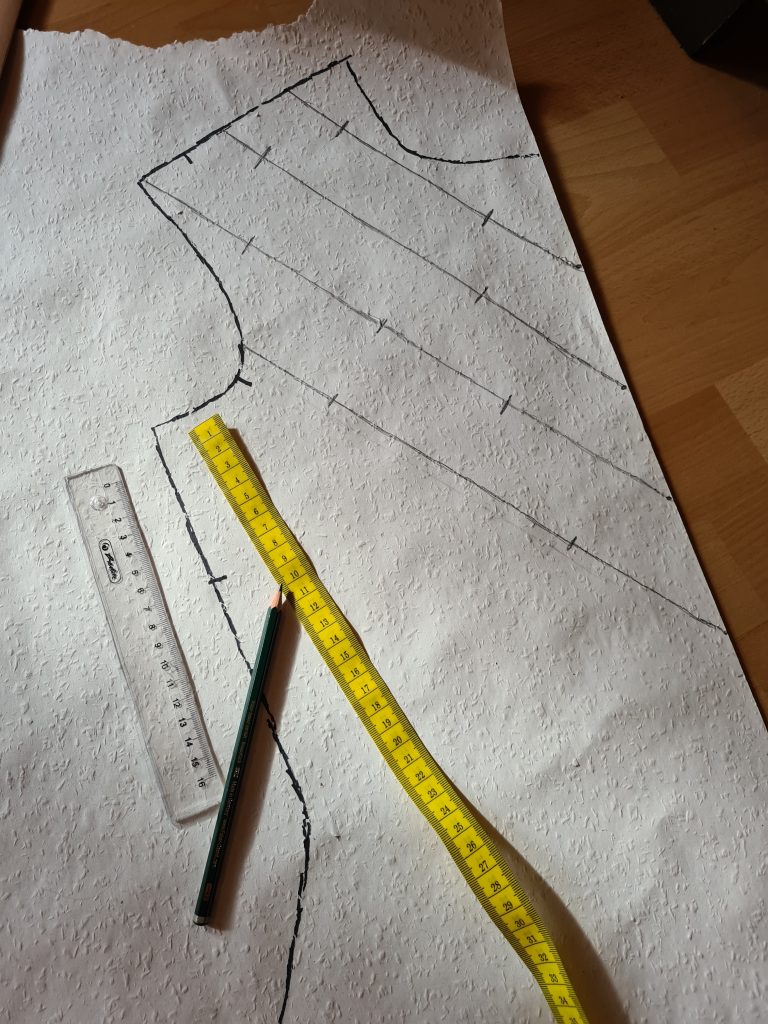
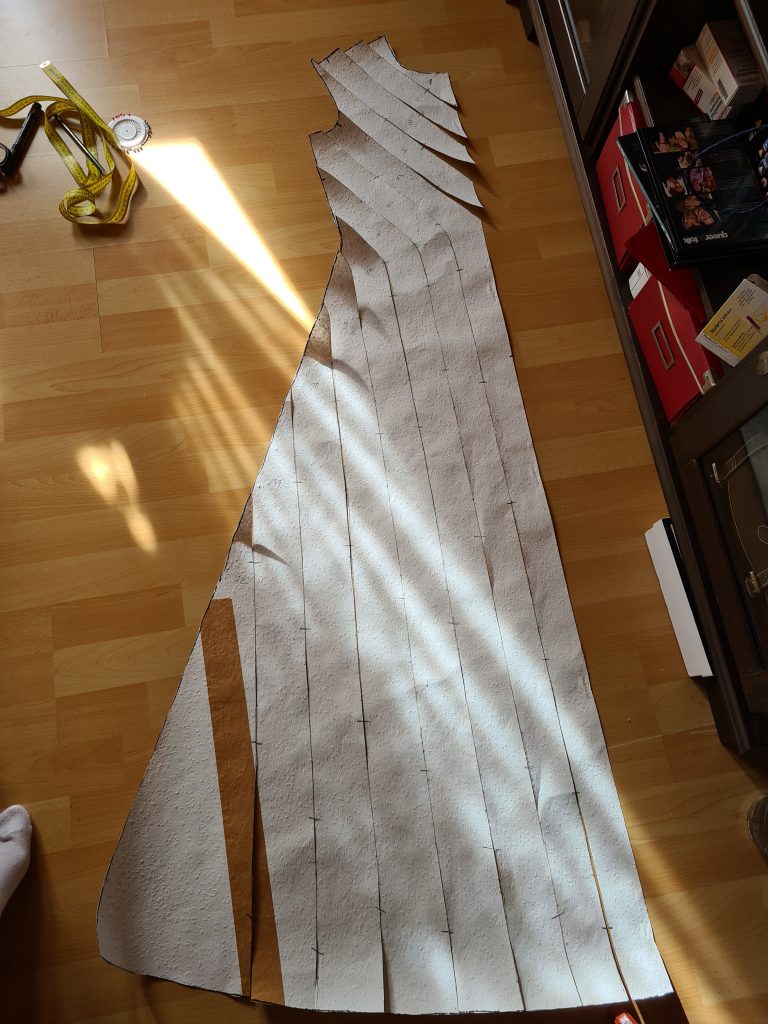
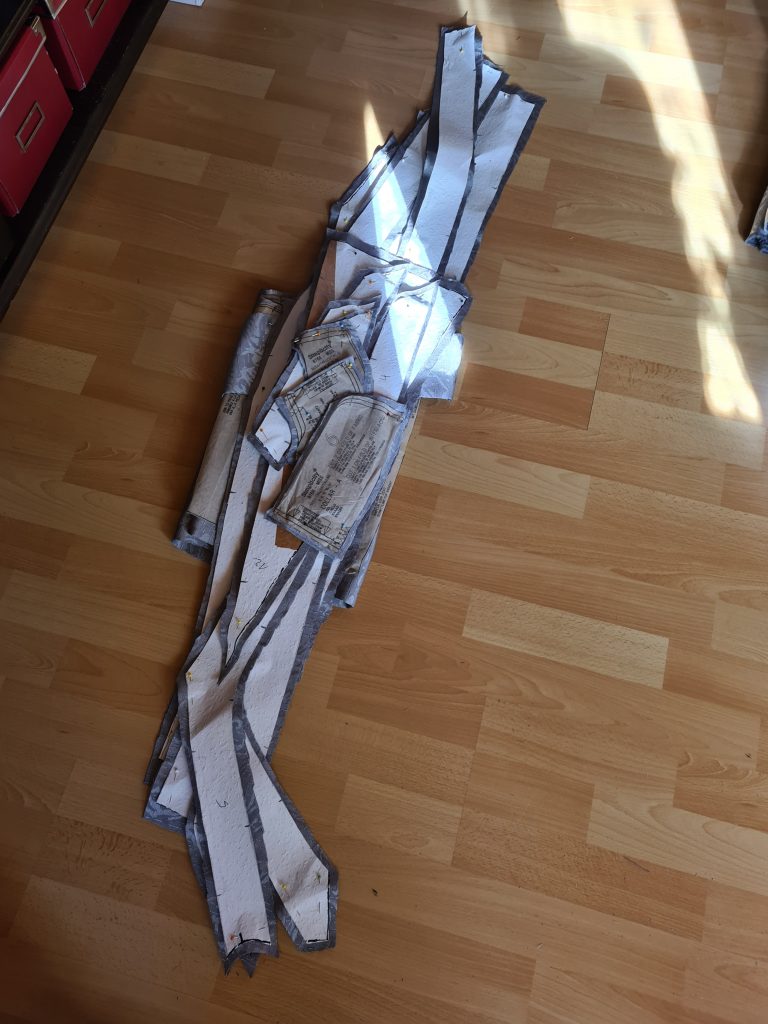
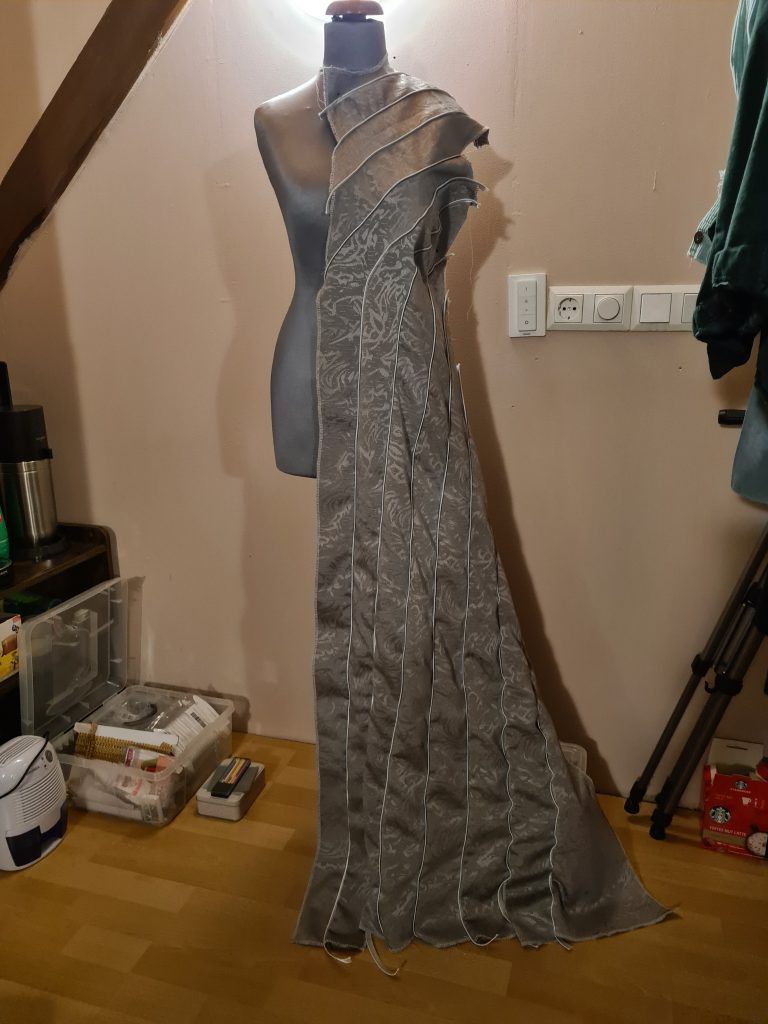
The first great challenge I encountered with this particular costume was the sewing pattern. Obviously, nothing exists that looks exactly like the robe that Thranduil wears when he greets the dwarves at Mirkwood and the cosplay guides for Thranduil that I managed to find online were nothing more than a collection of dead links. I’m still a little scared to really make a pattern from scratch, so I went through my (by now kind of extensive) collection of sewing patterns and picked the one that most resembled Thranduil’s tunic, at least in shape. I was able to use the sleeves and back from the original pattern, but the front looked very different as Thranduil’s costume is made up of many, many, many pieces in the front. So I placed the front pieces on a roll of old wallpaper which I kept precisely for this purpose and outlined their shape. If you’re planning on doing the same, bear in mind to mark the original arrows on your new pattern to align the pieces correctly. Once I had the outline, I looked at photos of Thranduil’s costume and tried to replicate the pattern by measuring, drawing, measuring, comparing, more measuring and even more drawing until half my front consisted of 12 individual pieces.
I cut them up and tried them out on some leftover fabric from another project to adjust the fit. I was very surprised to find that the fit was almost perfect and I only needed to do some minor alterations, but man, it already took a very, very long time to get to this point.
Making the Mirkwood Costume
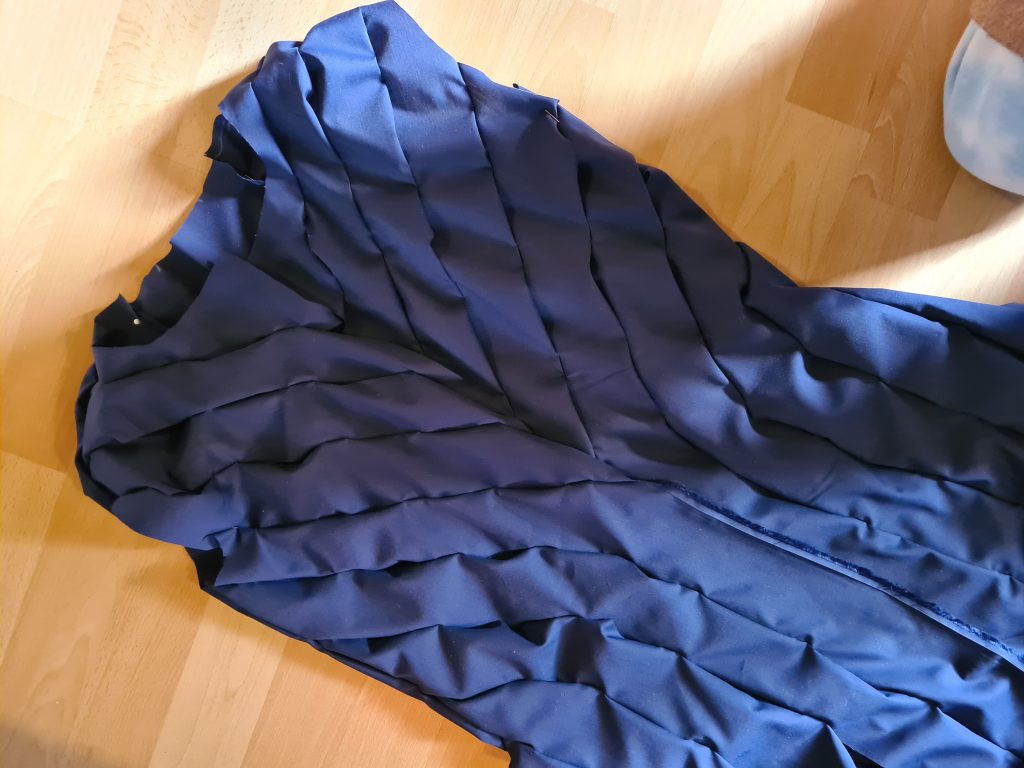
Since I was happy with the trial product, it was time to work on the actual fabric. I used a silver jacquard fabric that I found on a website I hadn’t previously used, but jacquard can be quite expensive and this one was only around 5 Euros per metre. It had a nice pattern, it was heavy and easy to work with, so I’m still incredibly happy with the purchase. After adjusting the pattern to my Thranduil needs, I had no less than 33 single pieces that needed to be cut out and run through my overlock machine. Phew, that took a while.
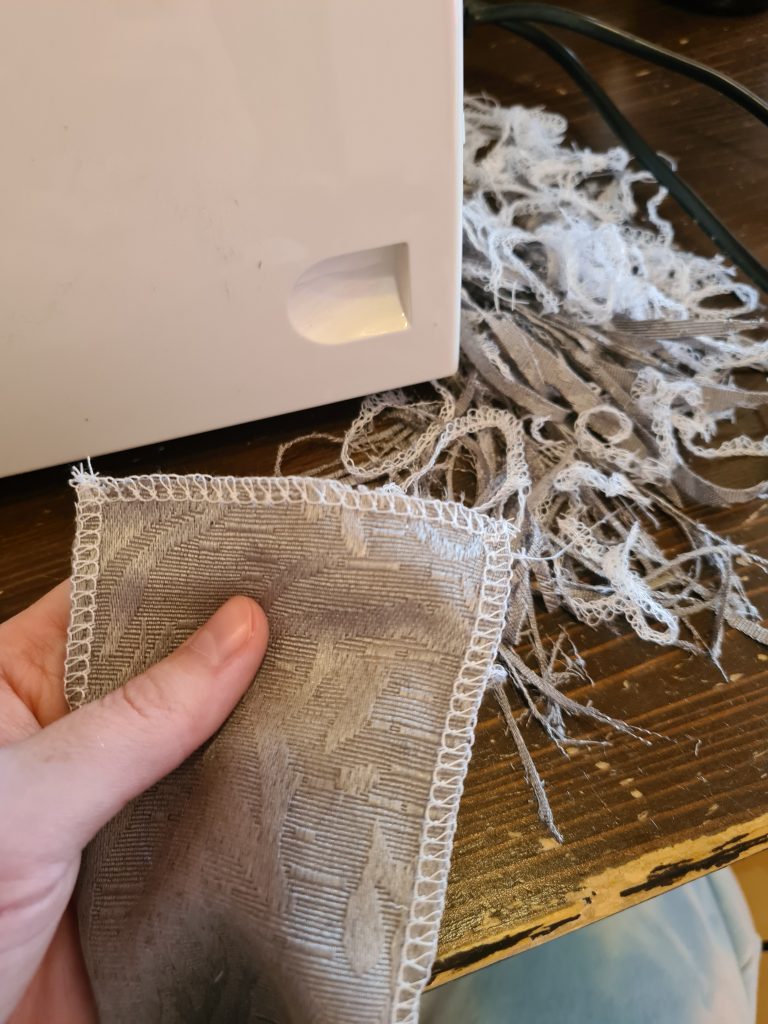
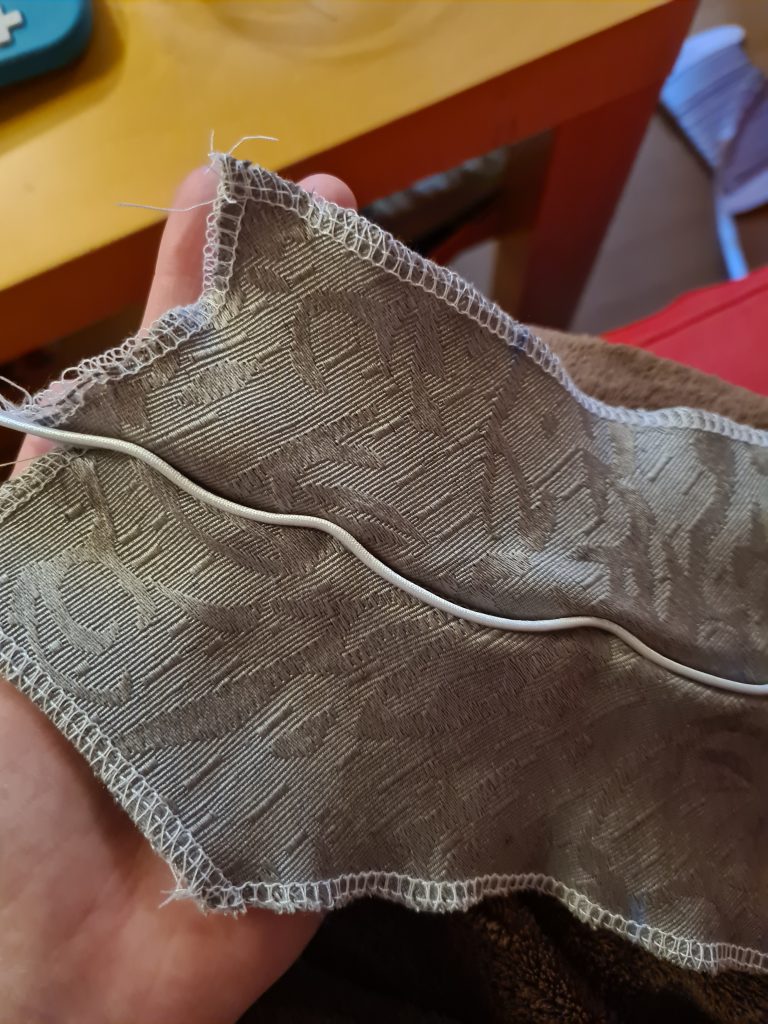
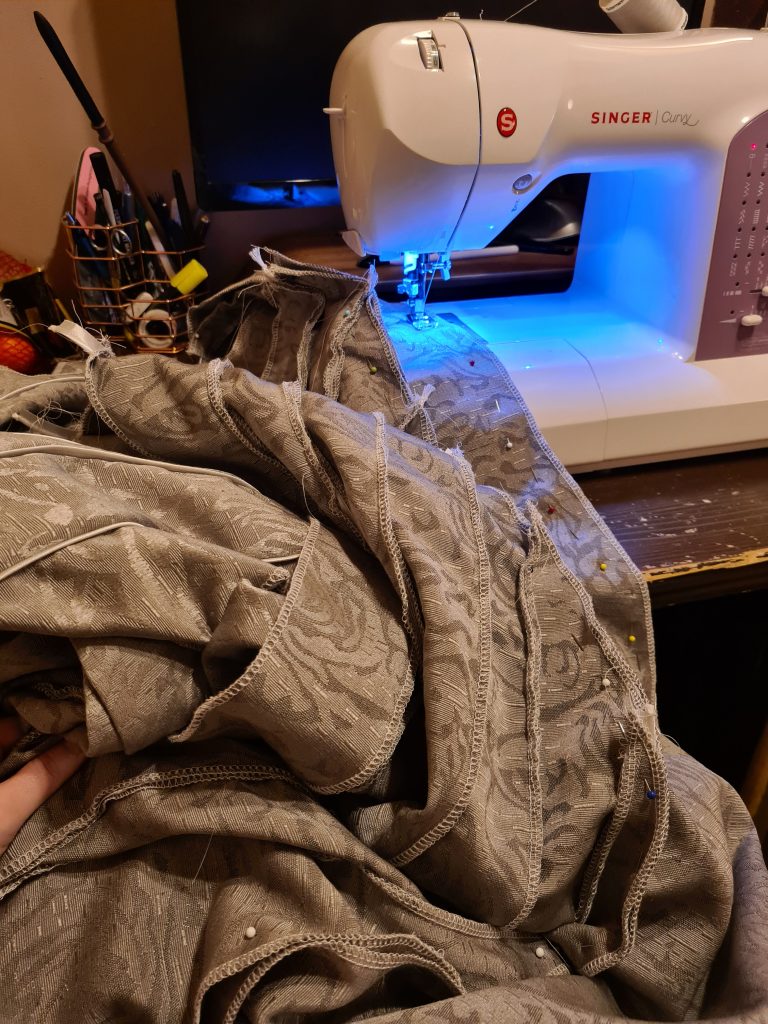
Then came the next challenge. I noticed that the seams on Thranduil’s Mirkwood outfit weren’t regular seams and I had no idea what this was called or how it was made since all my sewing skills are entirely self-taught and I hadn’t really come across anything like this before during my previous projects. I googled and found nothing, so I ended up calling my grandma who also had no idea what it was called or how it was made, so we went through her sewing books together and figured out that those were called piped seams. Yay, I love it when I can learn a new thing. When I googled it with the actual name, I found many tutorials on how to make your own piping, but I had already put many, many hours into this Thranduil cosplay and I wasn’t in the mood to make 20 metres of piping, so I went on Amazon and bought it.
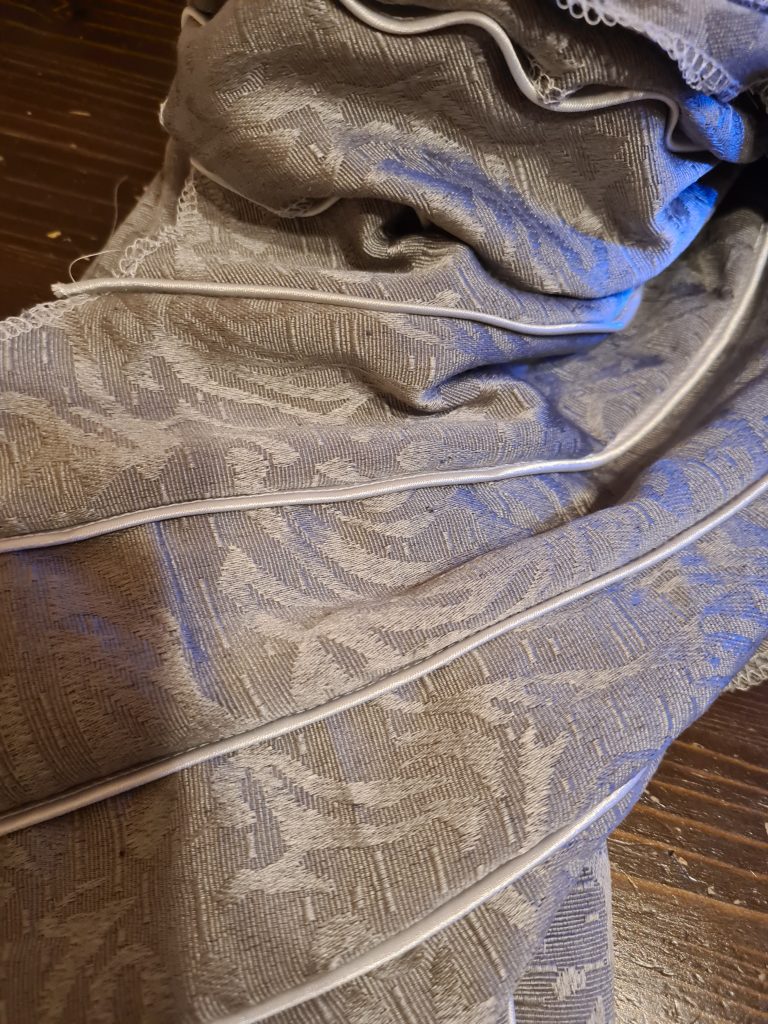
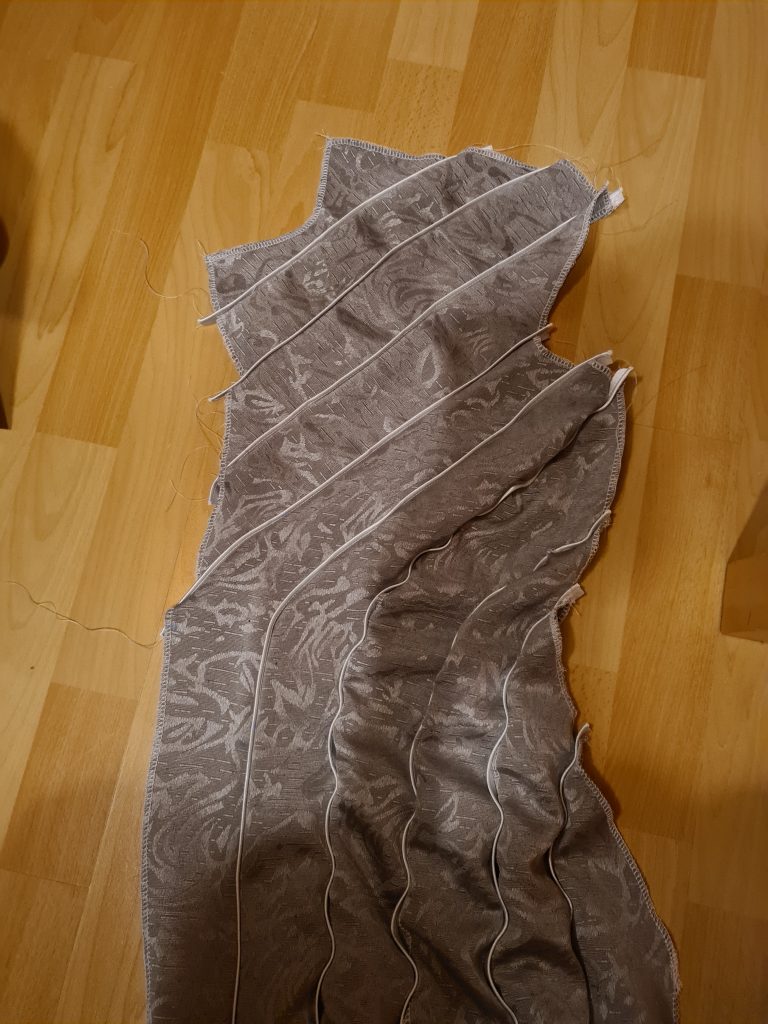
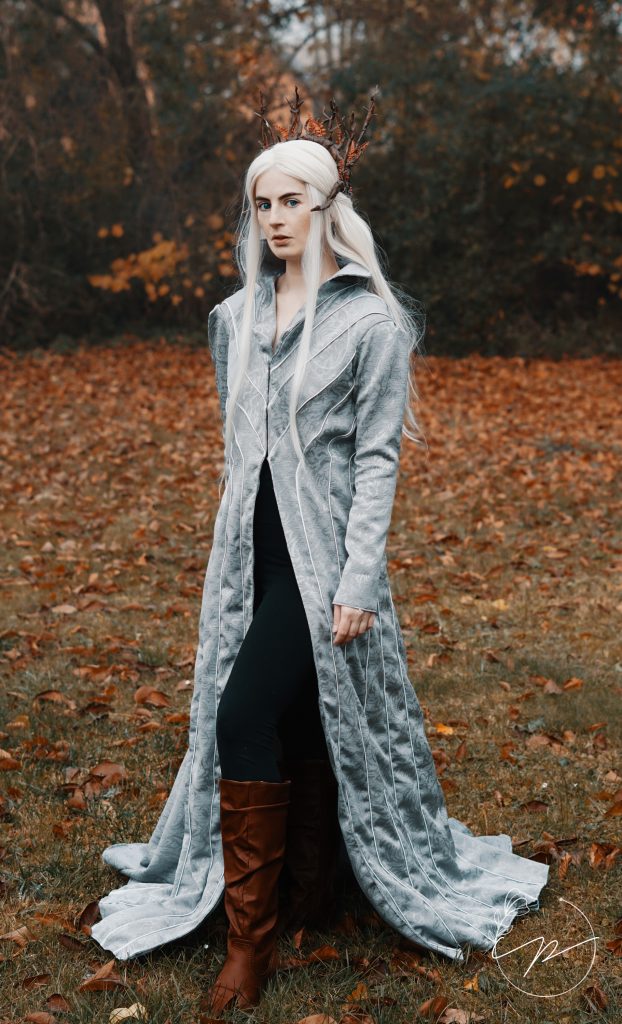
Once it arrived, I was able to start putting the pieces of Thranduil’s tunic together. I had assumed it would take forever because the front consists of 24 pieces and I needed to do a lot of sewing. In the end, it went a lot more quickly than I had expected because of my sheer determination and I was able to basically put everything together in only a few days. I can tell you, the final product is very, very heavy 😀

My Thranduil Cosplay is Finally Finished
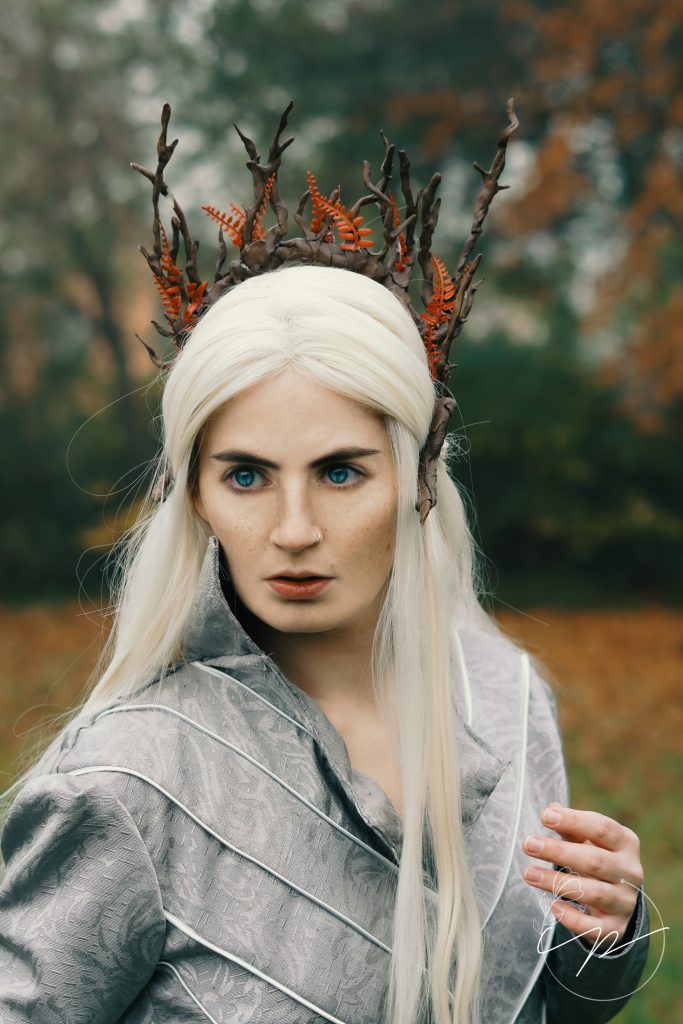
Once the pieces were put together, I added the sleeves, and the collar and finished the bottom seam and my Thranduil cosplay was ready to be worn after 17 hours of work. During my research, I watched a few behind-the-scenes clips and there is one of Lee Pace stumbling over this exact tunic and saying: “This wardrobe is a menace.” I can confirm that it is, indeed, a menace. I didn’t leave mine as long as the original for practical reasons. I take a lot of outdoor photos with my costumes and with long ones, I always end up dragging half the garden back inside with me, so I decided to leave it long and flowing, but not so long that I wouldn’t be able to navigate in it.
Overall, I am extremely happy with how my Thranduil cosplay worked out, but I’m a little sad that it happened so late into the year and I wasn’t able to use the gorgeous autumn weather for it.