Pattern: No Commercial Pattern
Working Time Total: 14 hours
Materials:
Vest: Furniture Fabric in Mocca, 2m
Obi Belt: Decor Fabric in Dark Grey, 0.5m
Shawl: Crepe Chiffon in Grey, 2m
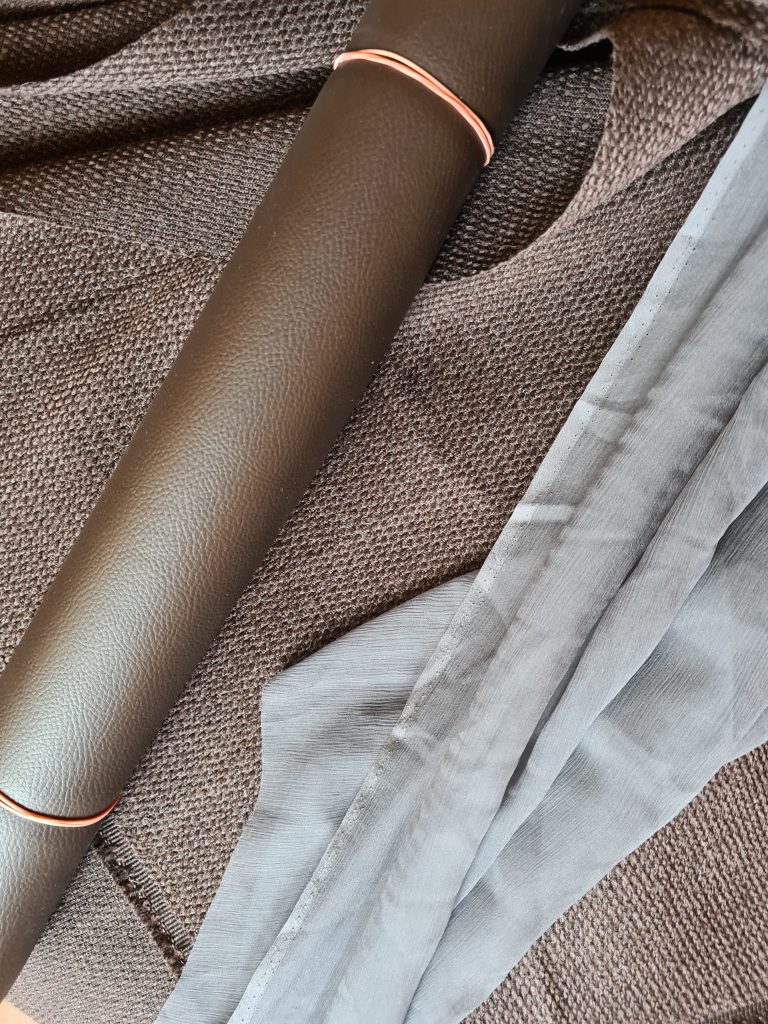
Belt & Wrist Cuffs: Faux Leather in Dark Brown, 0.5m
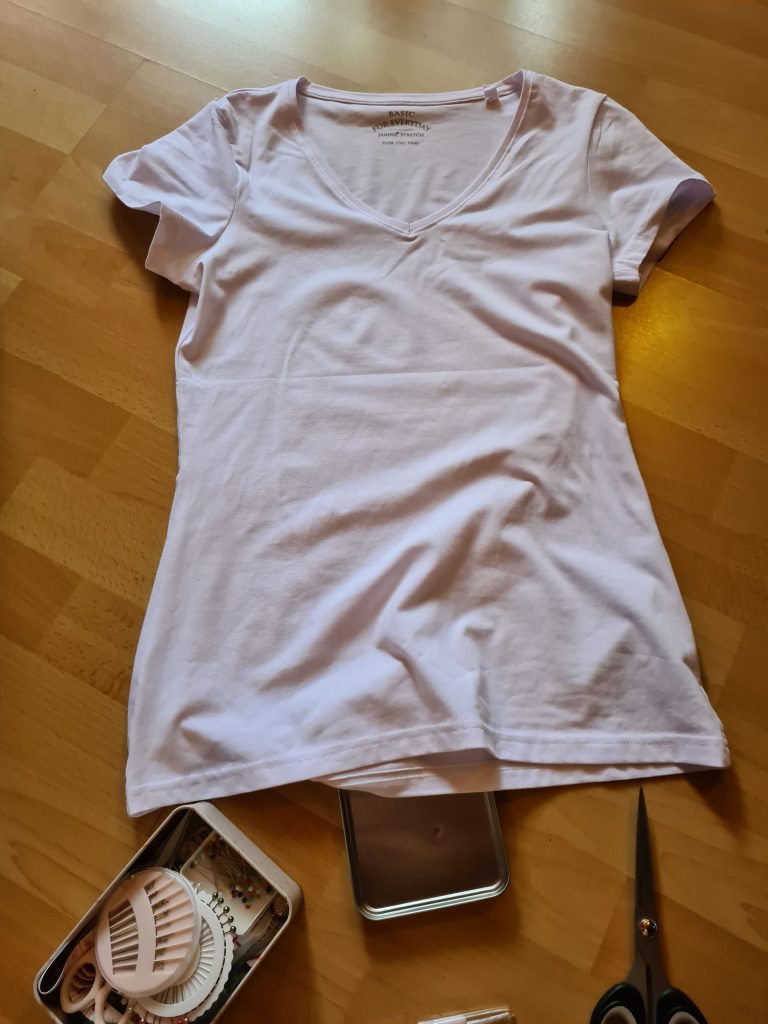
Shirt: 2 Cotton T-Shirts in White
Materials Cost Total: 75,56 Euros
Additional Accessories:
Grey Trousers: Pre-Owned
Boots: Pre-Owned
Lightsaber (Shiva Saber) from Etsy: 116 Euros
Gauze Bandages, 2x: 2 Euros
Costs Total: 193,76 Euros
Making Rey’s The Last Jedi Tunic
This particular cosplay was a challenge for me that came with a big first: creating my own sewing pattern. While there are multiple commercial sewing patterns available for Rey’s The Force Awakens outfit and at least one for Rey’s Ahch-To look, there was nothing for the brown tunic (I still love the theory that it was Ben’s old tunic). Since there was nothing remotely similar to be found, I had to actually sit down with pen and paper and draft my own sewing pattern.
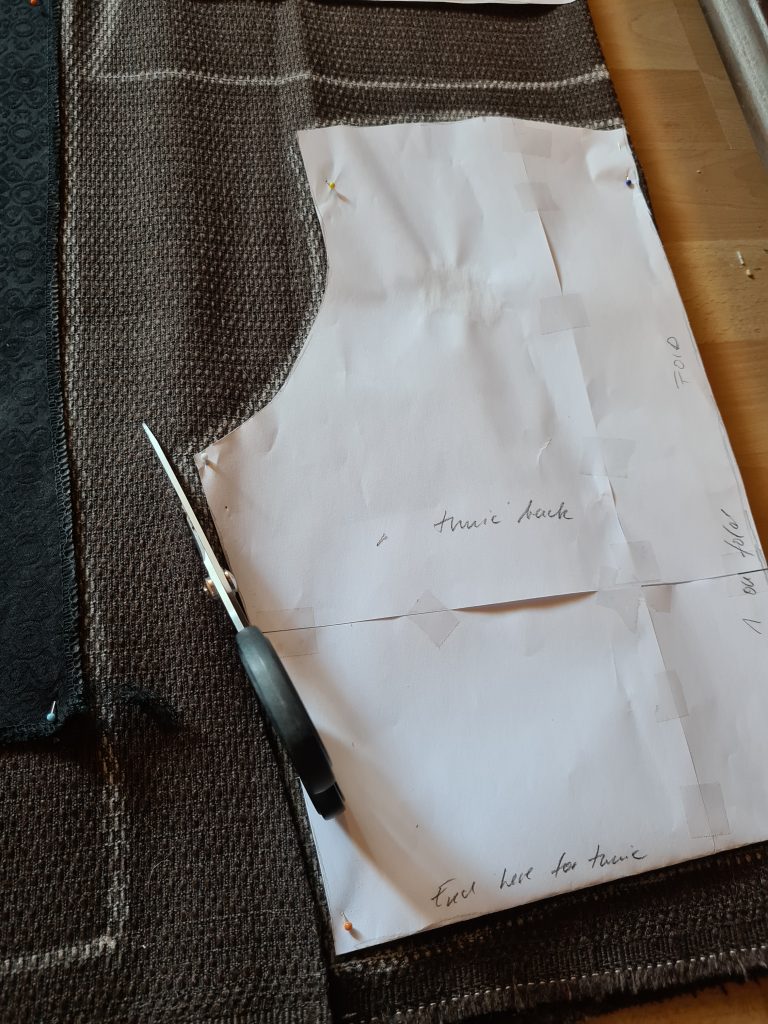
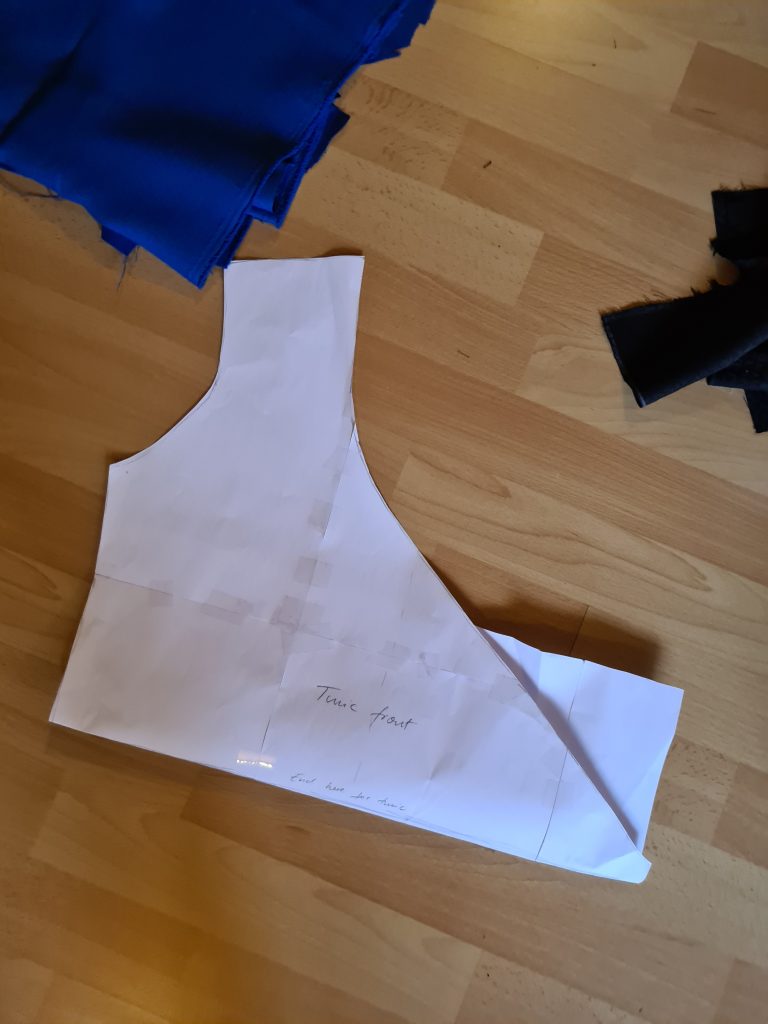
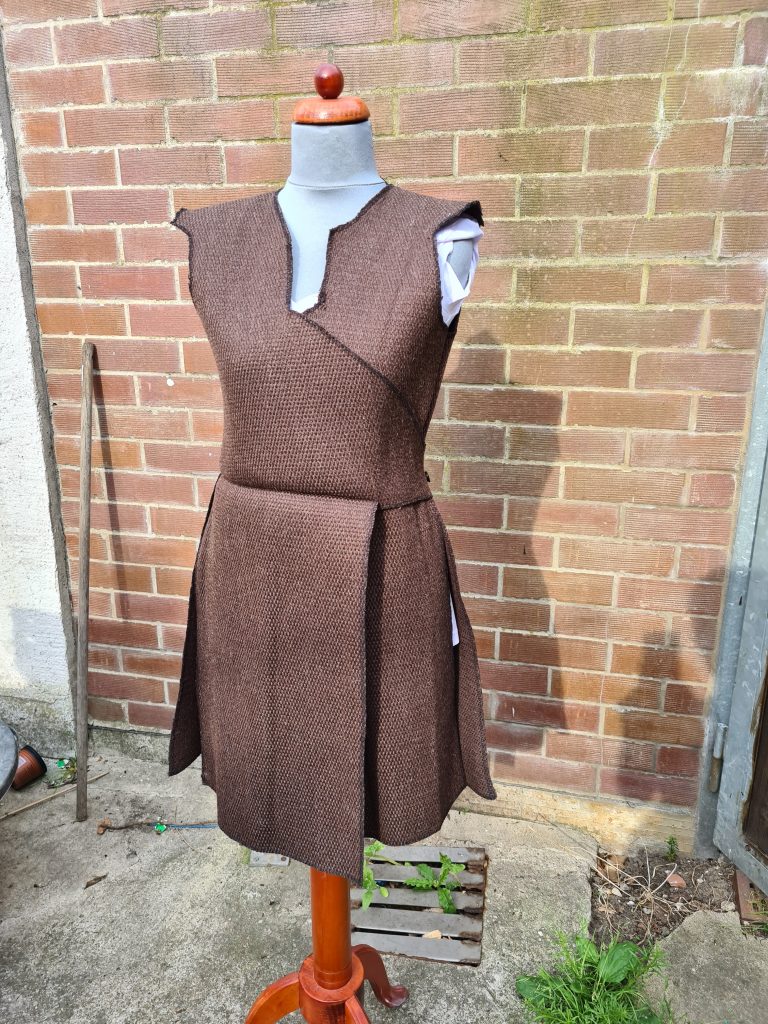
I created a trial version out of leftover black fabric which I ended up using as an improvised Dark!Rey outfit. I made the tunic out of six parts: two overlapping front parts, the back and a sort of “skirt” (with side slits) that attaches to every corresponding top part. I used an old, cut-up shirt as a size reference when I drafted the pattern because I had never done anything like this before. Sure, I had altered existing patterns, but this was the first I actually made from scratch.
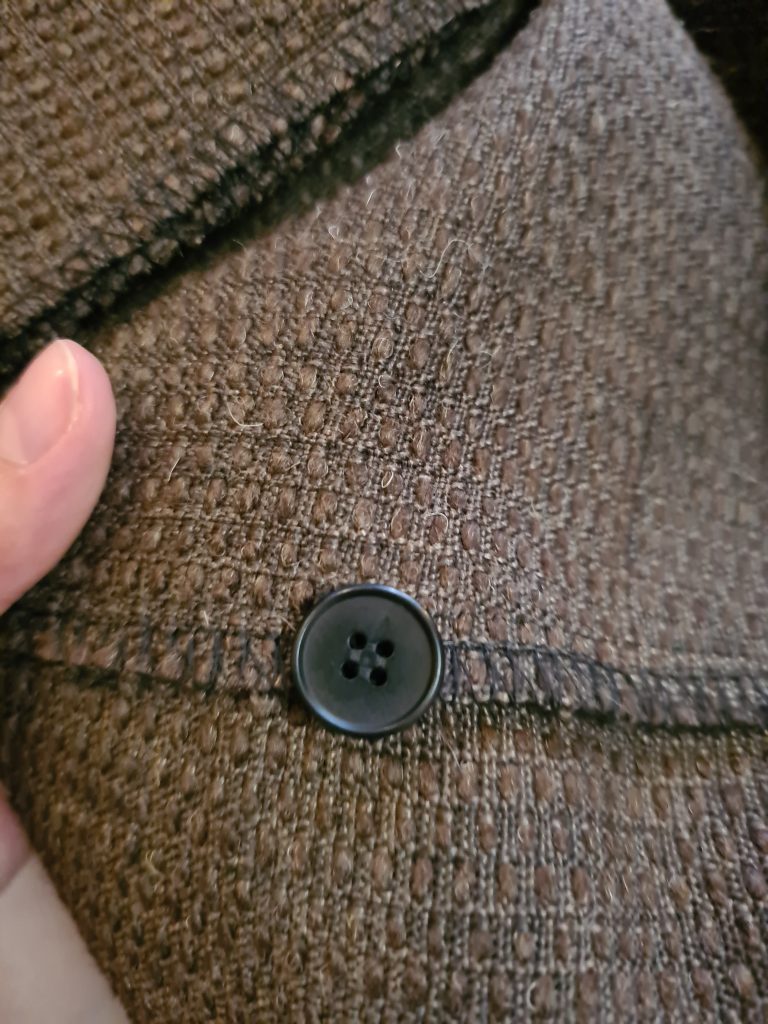
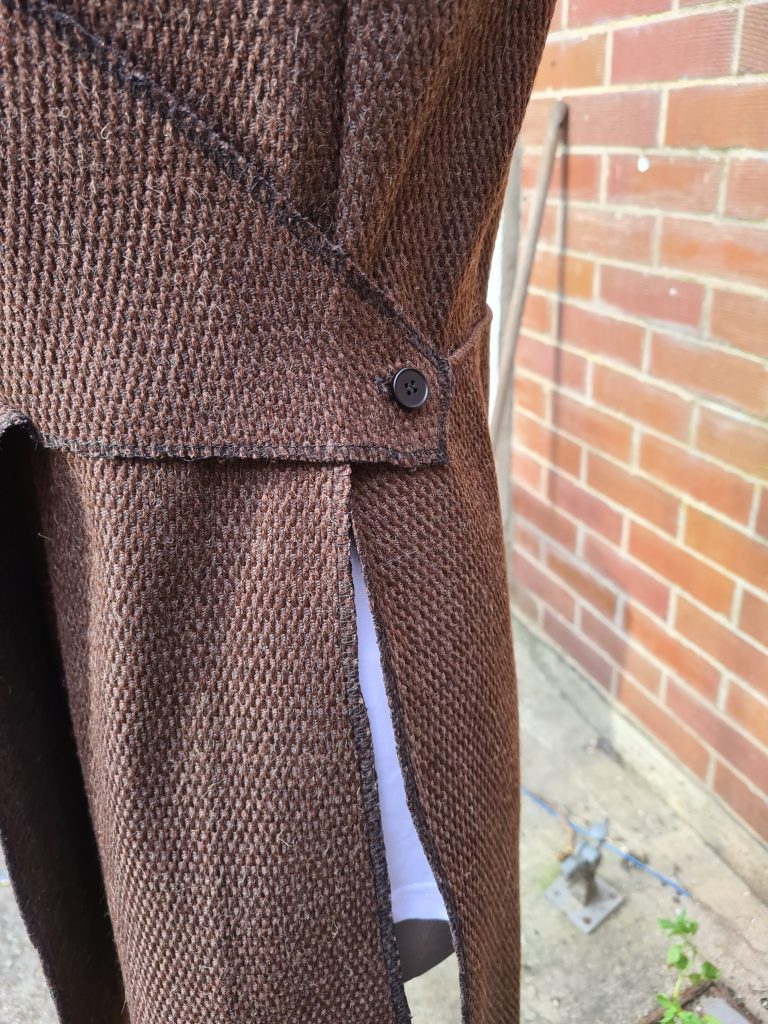
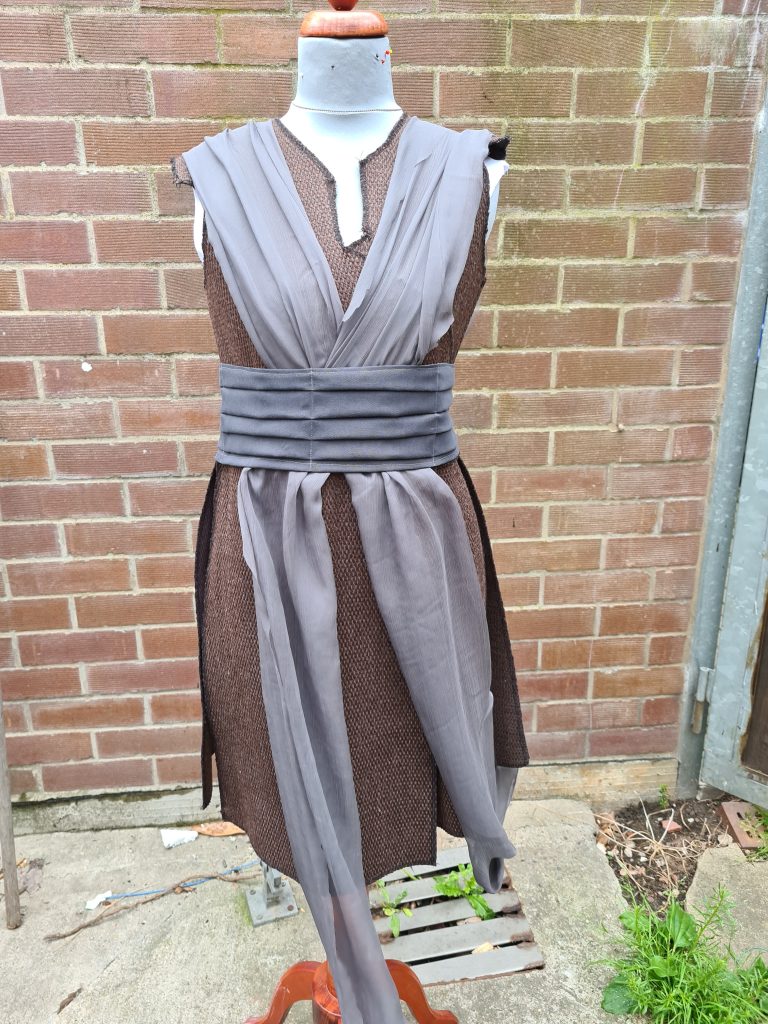
After making sure it fit by testing the pattern on leftover fabric, it was time to have a go at the actual fabric I wanted to use for the tunic. I used very heavy, very sturdy outdoor furniture fabric that almost killed my scissors. After running the pieces through my overlock machine, I decided not to hide the seams because, taking a closer look at Rey’s own tunic, I decided not to have it too clean-looking. Once the pieces were put together, added buttons on either side of the waist to secure the overlapping parts. Overall, making the vest (including pattern-drafting), took me 6 1/2 hours.
How to Make Rey’s Undershirt – The Simple Way
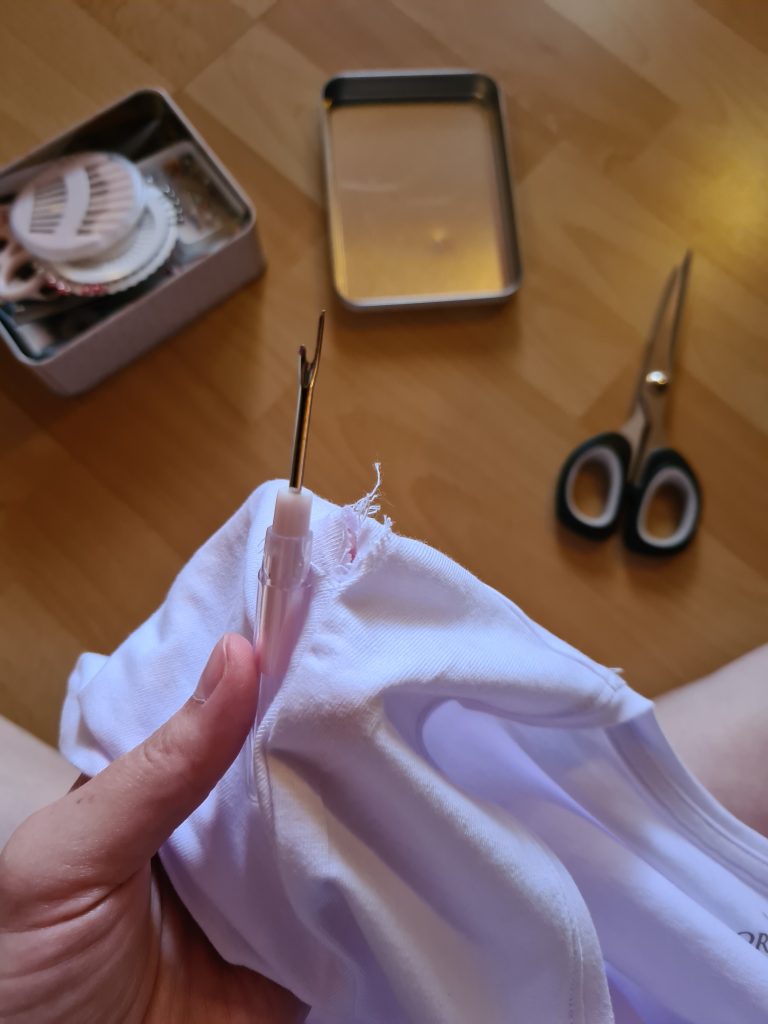
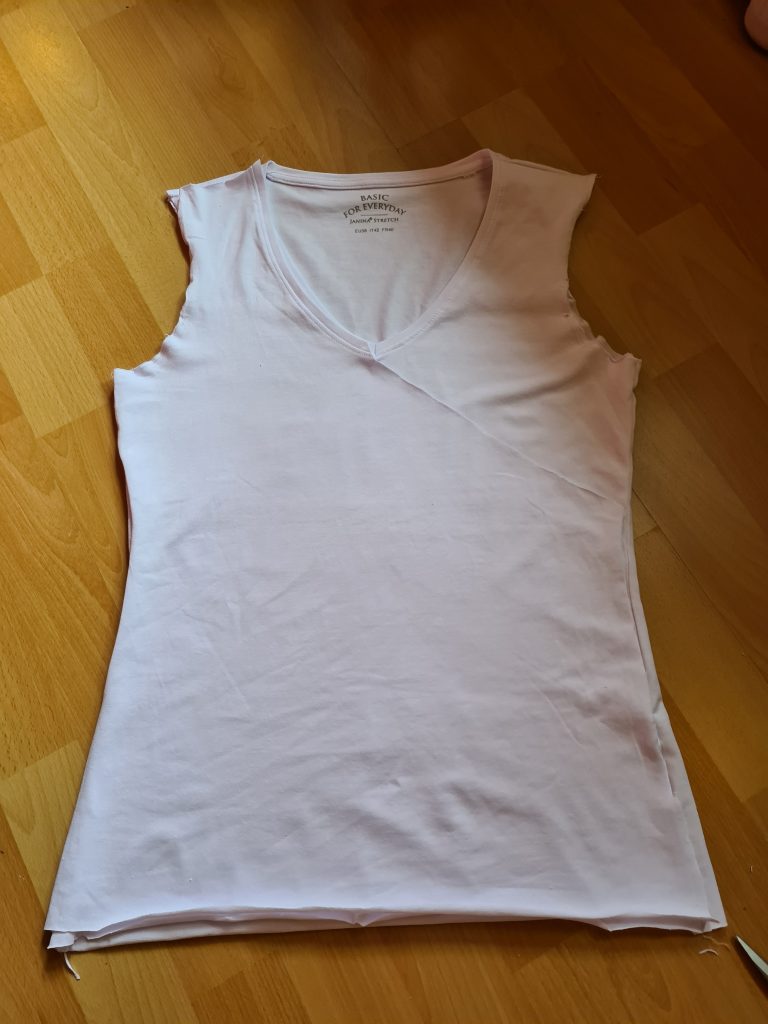
When you take a closer look at the various reference photos available on the internet, you can see in some of them that Rey wears a simple, white shirt underneath the tunic. It’s possible that it’s the same sleeveless shirt with the overlapping front we see her wear with the Ahch-To outfit. But since it’s mostly hidden beneath the tunic and I needed the Ahch-To shirt for my other cosplay anyway, I decided to use the same shirt for both outfits. Now, I could have made this one from scratch, as well, but instead of buying expensive fabric, I bought two plain, white, V-neck T-shirts for 3 Euros each. As you can see in the photos below, I removed the sleeves, cut them up and reattached them to recreate the overlapping look. This took no more than 1 1/2 hours.

Finishing Rey’s Outfit
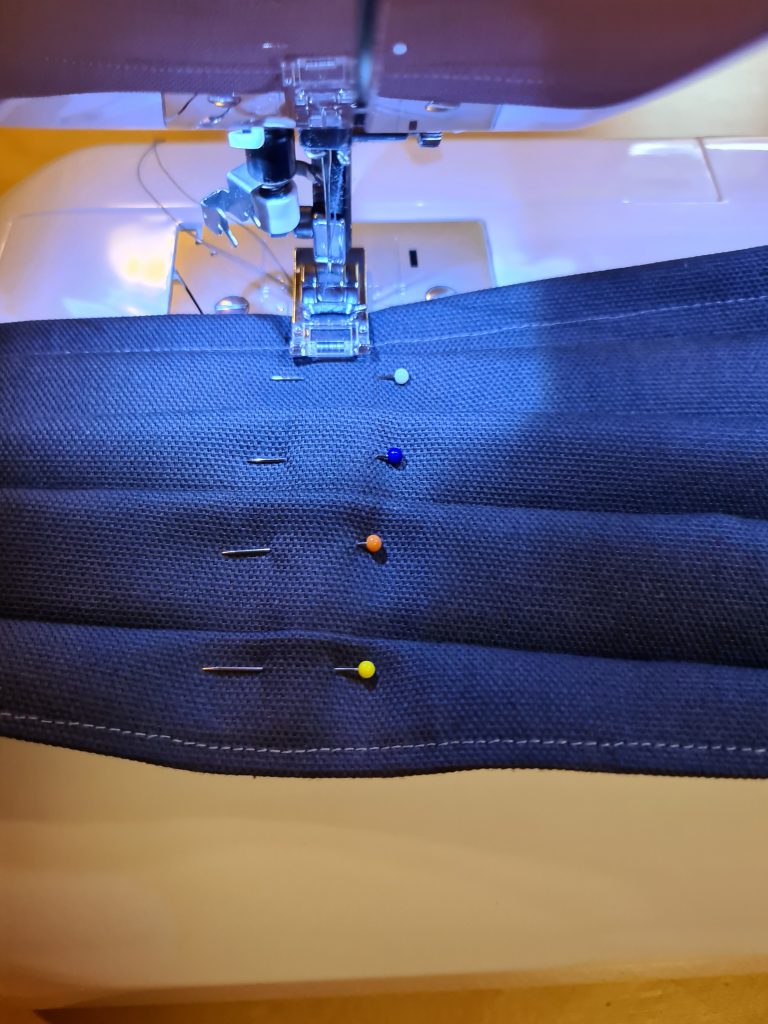
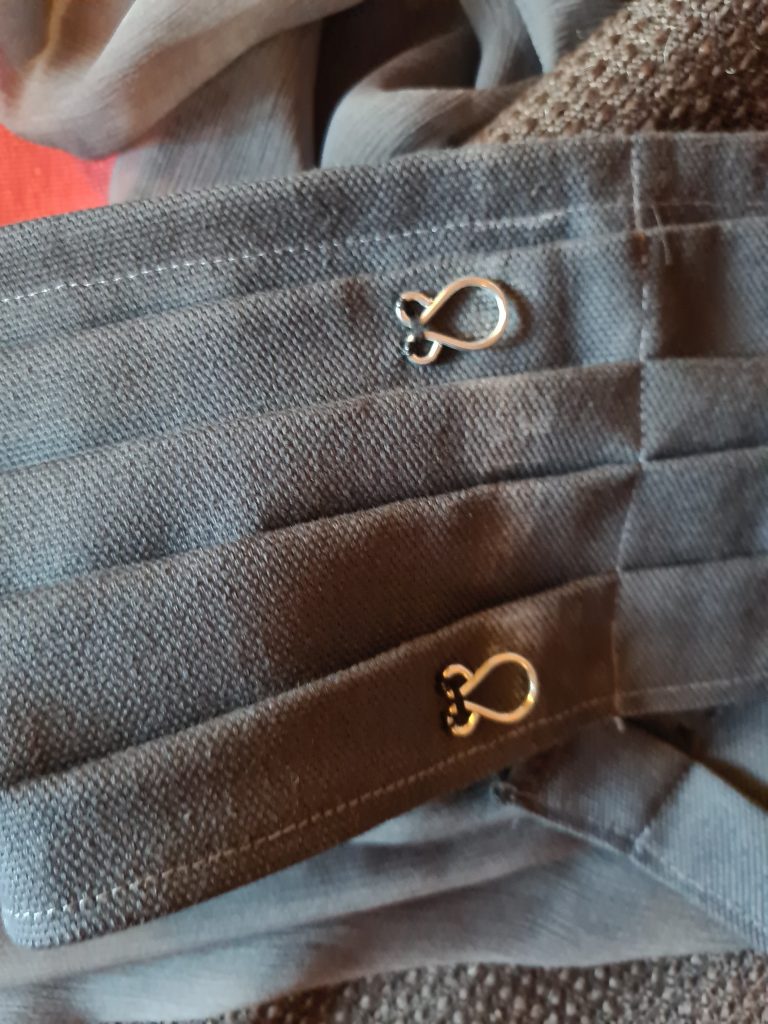
The obi belt Rey wears over her tunic was simple, too. I only needed to measure my waist and cut out a broad strip of fabric. I folded and overlapped the fabric to recreate Rey’s look, sewed it into place and attached two hooks at the back to fasten it around my waist. For this, I also used sturdy furniture/decor fabric and it took me 2 hours.

I have to admit, every time I put on my Rey outfit, I have to open a photo to check exactly how her shawl is draped around her body cause I can never remember it. This one was both easy and difficult to make. Easy because I just had to cut out two pieces that were the right width from the fabric and sew them together. Difficult because the grey chiffon I chose is very delicate and I was afraid that the sewing machine might ruin it. I didn’t want to spend a ton of money on 4m of fabric, so instead, I opted for just 2m and sewed two pieces together. The seam is the part of the shawl that sort of loops near the bottom, so the seam created some extra weight for it to fall a little heavier in that area. There is no pattern for this and it took an hour and 20 minutes.
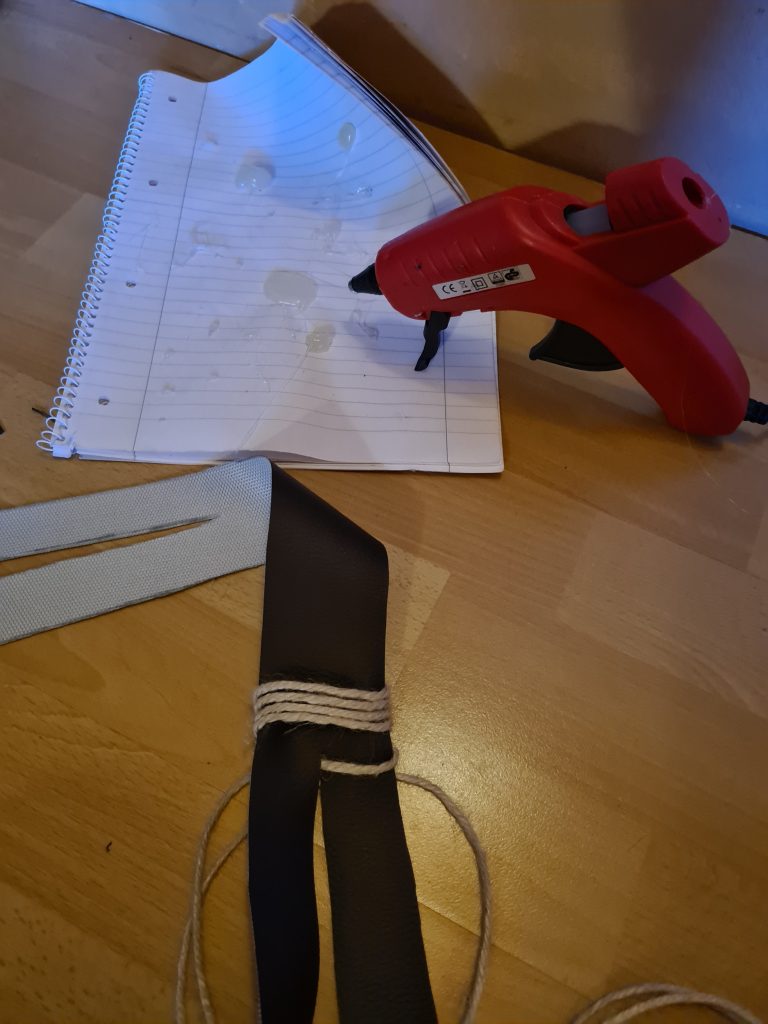
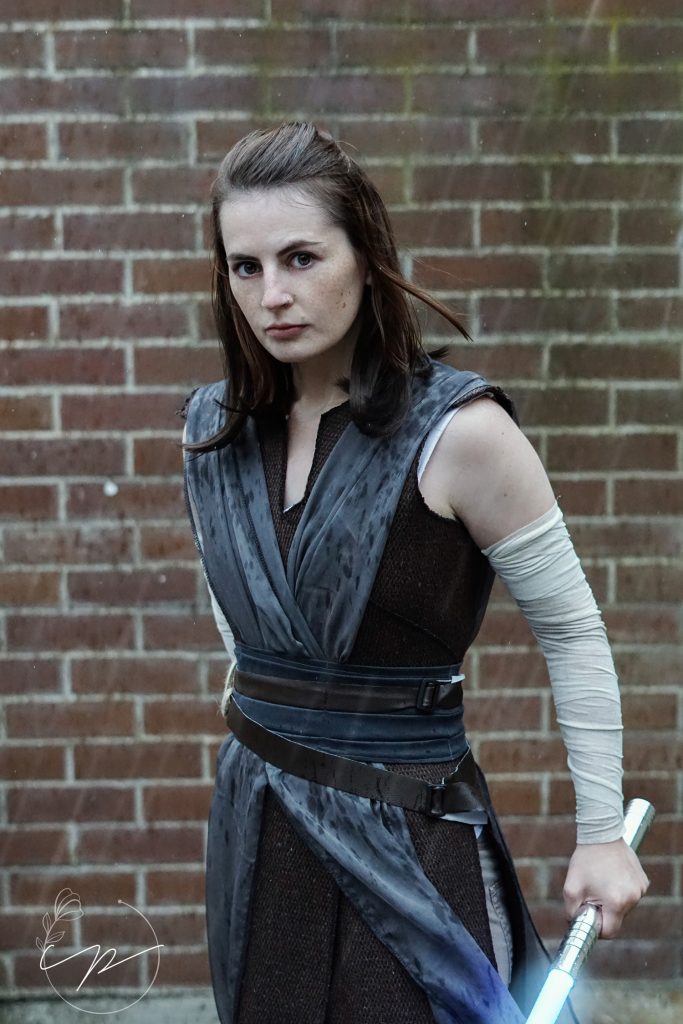
The belt and arm cuffs proved to be a bigger challenge and I’m not entirely happy with the fabric I chose. Later on, I bought a Rise of Skywalker outfit from Etsy and it came with a great belt and cuffs made out of sturdy faux leather, so in the future, I think I’m going to use this for the TLJ look, as well. A word on the Etsy costume: I got the whole thing for roughly 120 Euros and I do not regret the purchase one bit as I would have paid more for the fabric had I made my own. If you’re looking to cosplay Rey from any film, check out Etsy and you might find a suitable cosplay there. Mine was really well made out of very nice fabric and I especially loved the belt and cuffs that I could never have created like that with my own sewing machine. For mine, I had to stick to softer faux leather because my sewing machine gets a bit angry whenever I work with thicker materials.
I used simple gauze bandages to wrap around my arms to recreate Rey’s look, but since new bandages are plain white, I, uh, helped to make them look a little dirtier. I stained them with dissolved instant coffee and rubbed them in dirt to give them a more used look. The tutorial for Rey’s staff can be found here.
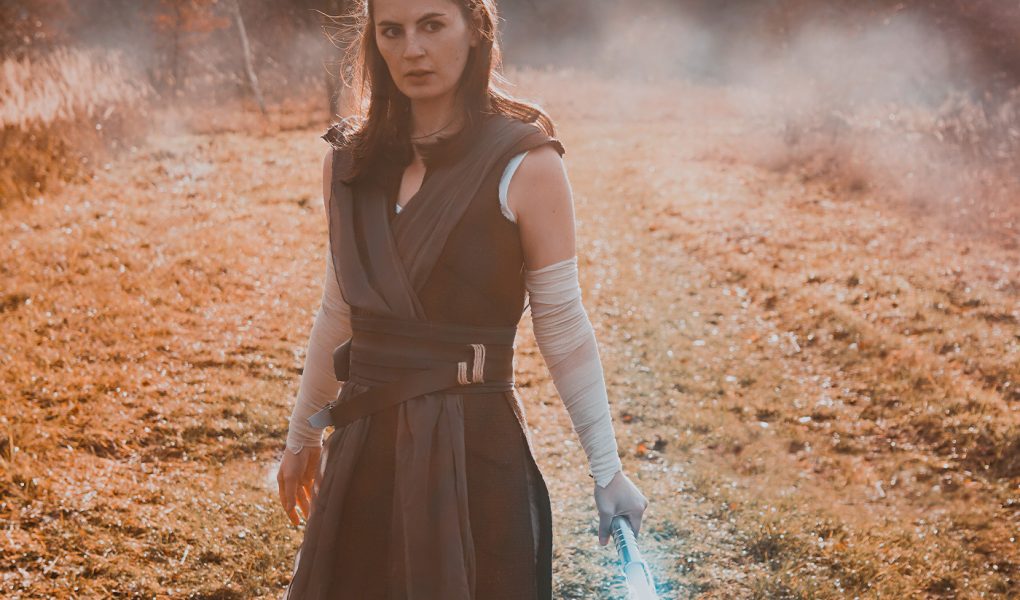
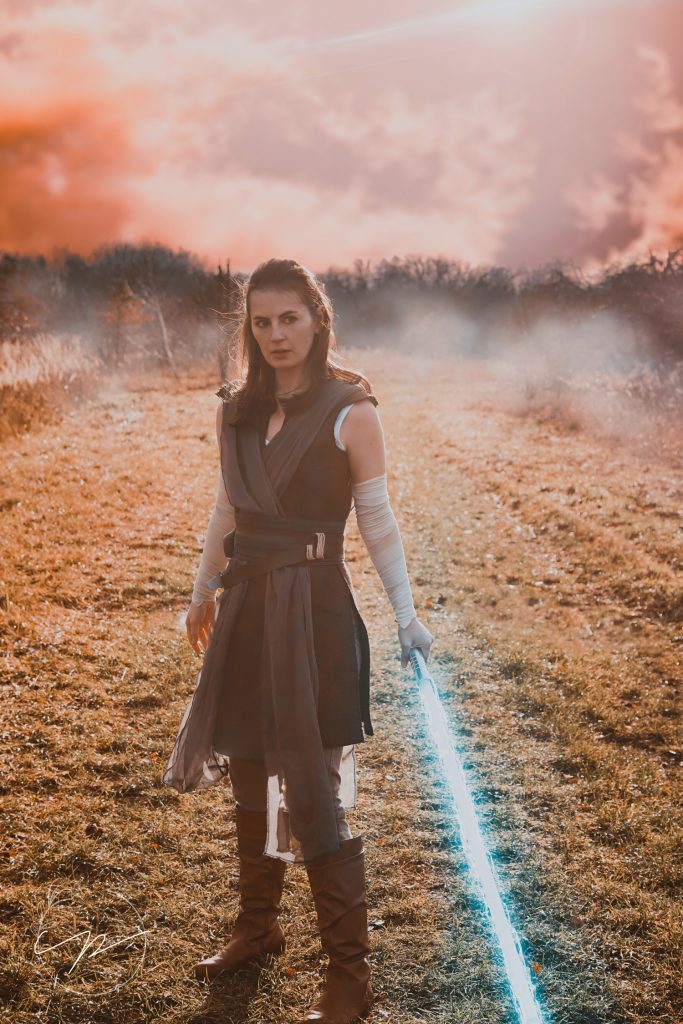
Cosplaying Rey from Star Wars (TLJ)
If I had to choose a favourite Rey outfit, I’d probably despair because I can’t decide which one I like best. However, this was the first that caught my attention because The Last Jedi is my favourite of the recent three movies (continuing the tradition that I always like the middle one best). I love putting it on and swinging my lightsaber and I also love playing with cool effects in post-production of my cosplay photos. Even though this outfit broke my scissors and I had to make my very own sewing pattern, making this Rey cosplay was a lot of fun. Apart from the trousers and boots that I already owned, I spent 75,56 Euros on just the materials, or 193,76 Euros if you count the lightsaber and gauze bandages, too. Overall, I spent 14 hours on this particular Rey cosplay.