Making Rey’s Staff
Materials: Various bits and bobs from the hardware store, glue gun, black spray paint, leftover fabric strips, laptop bag strap
Total Cost: 45 Euros
Total Working Time: 4 Hours
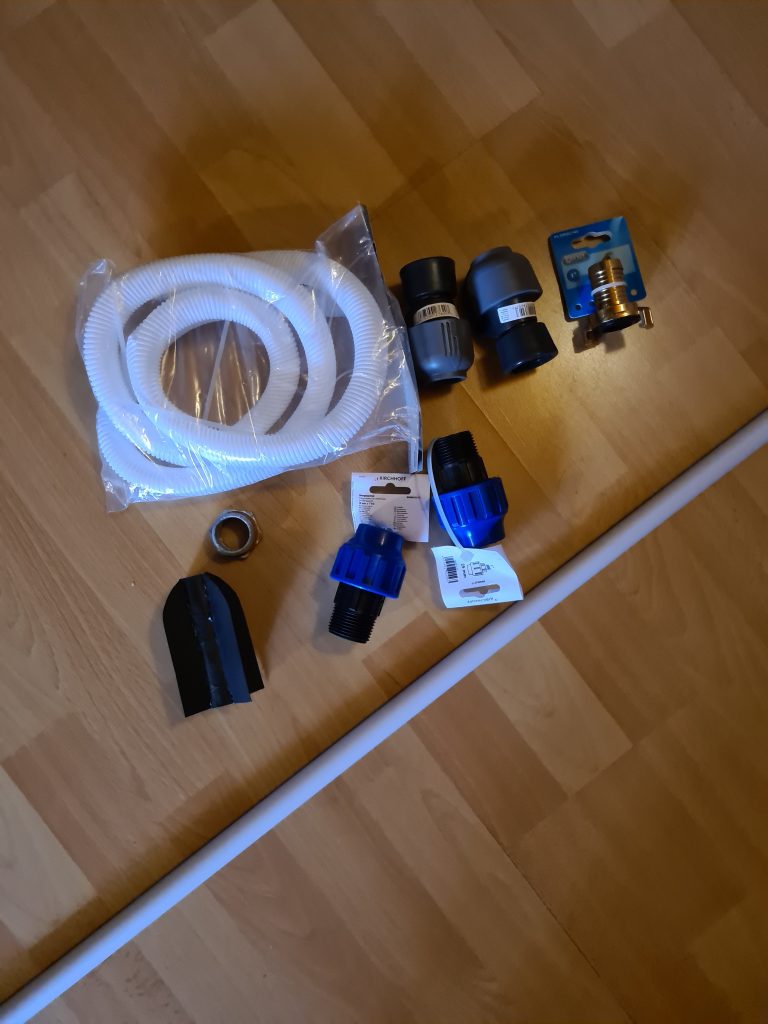
There are a lot of tutorials on various blogs and also YouTube Channels about how to make Rey’s staff and almost all of them start with: “using these basic items you have at home”. Well, I did not have any of these just lying around my home (except for an old, rusty nut), so I needed to go out and purchase them.
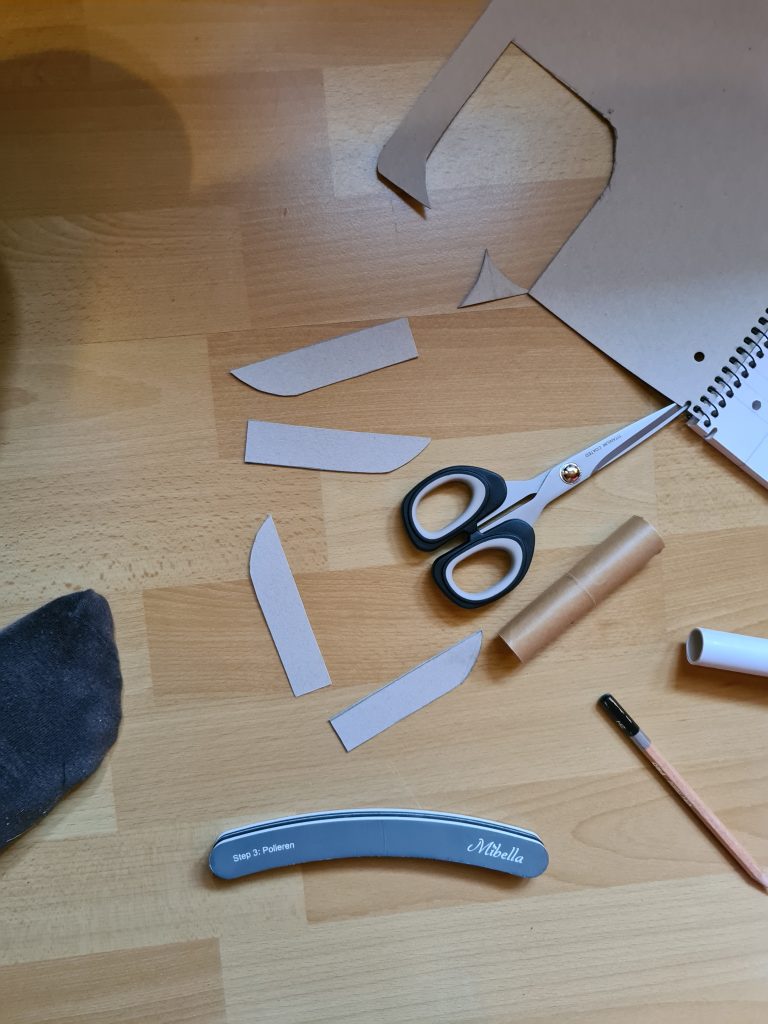
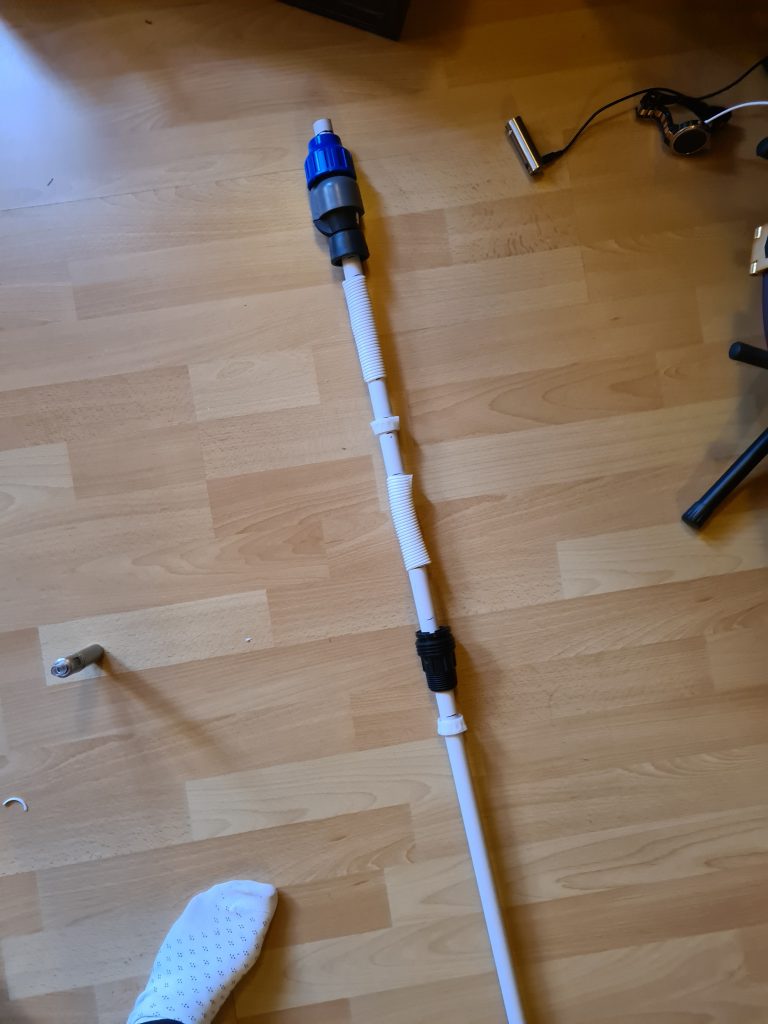
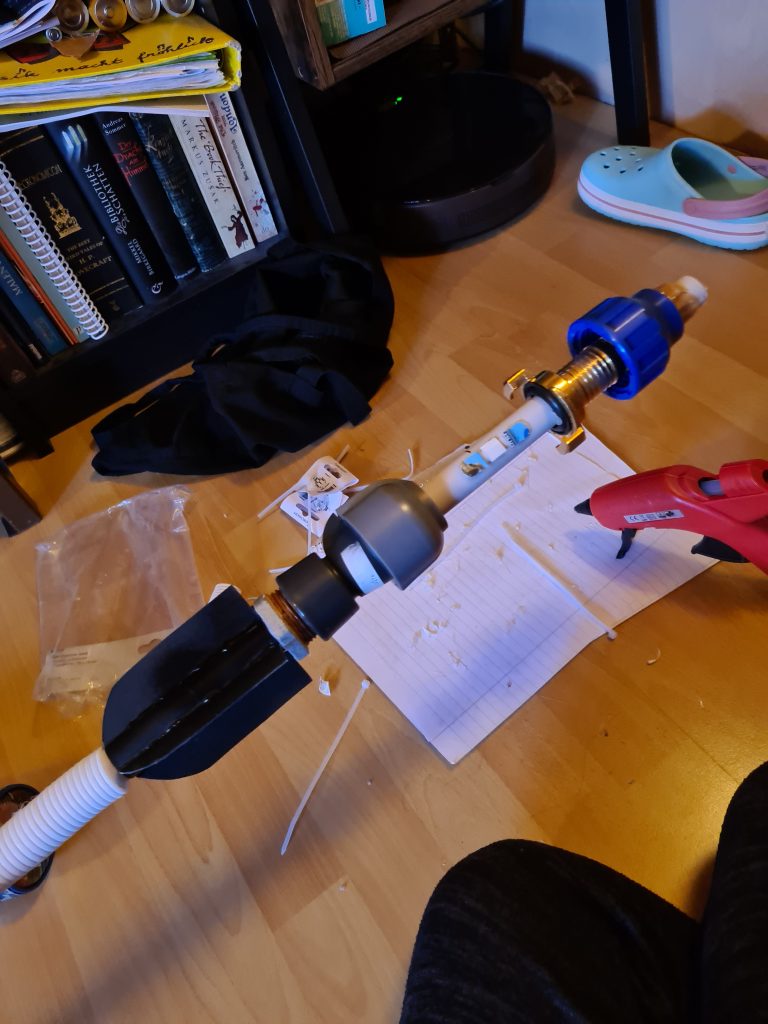
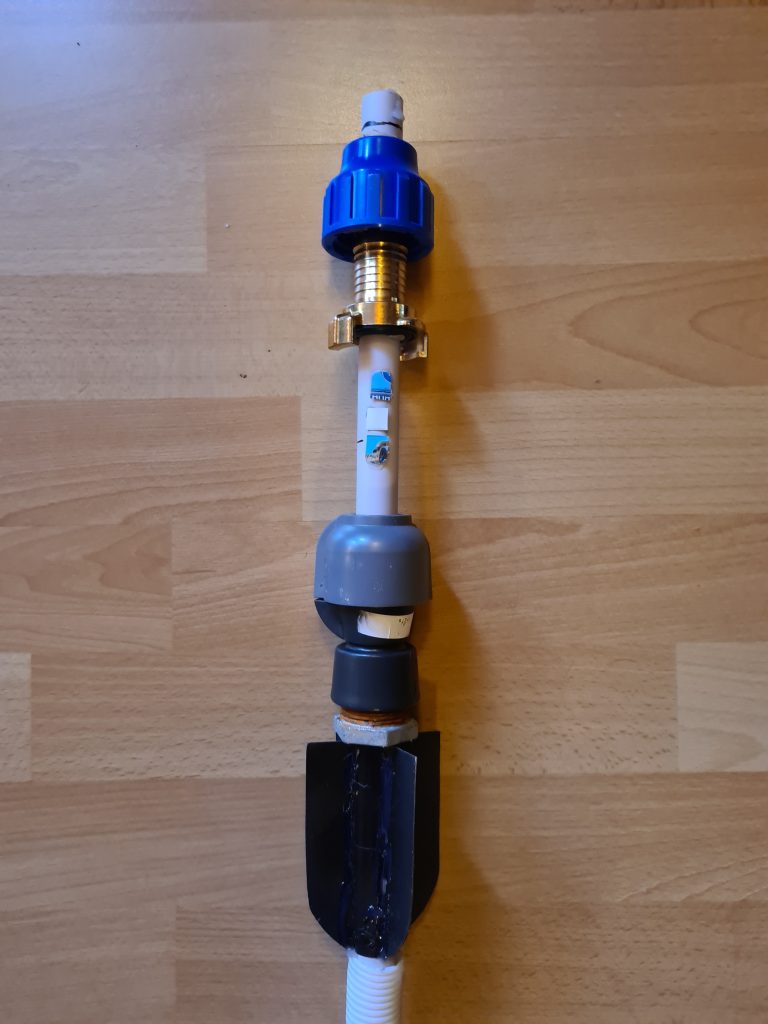
I downloaded many reference photos on my phone and took them to the hardware store where I compared the looks of Rey’s staff to various bits and bobs from different departments. The base was very easy to find and the true challenge proved to be finding something to fit on top of it so it could be glued together. I found most of these items in the garden department. The only part that I couldn’t find something similar to, I recreated with an empty toilet paper roll and cardboard.
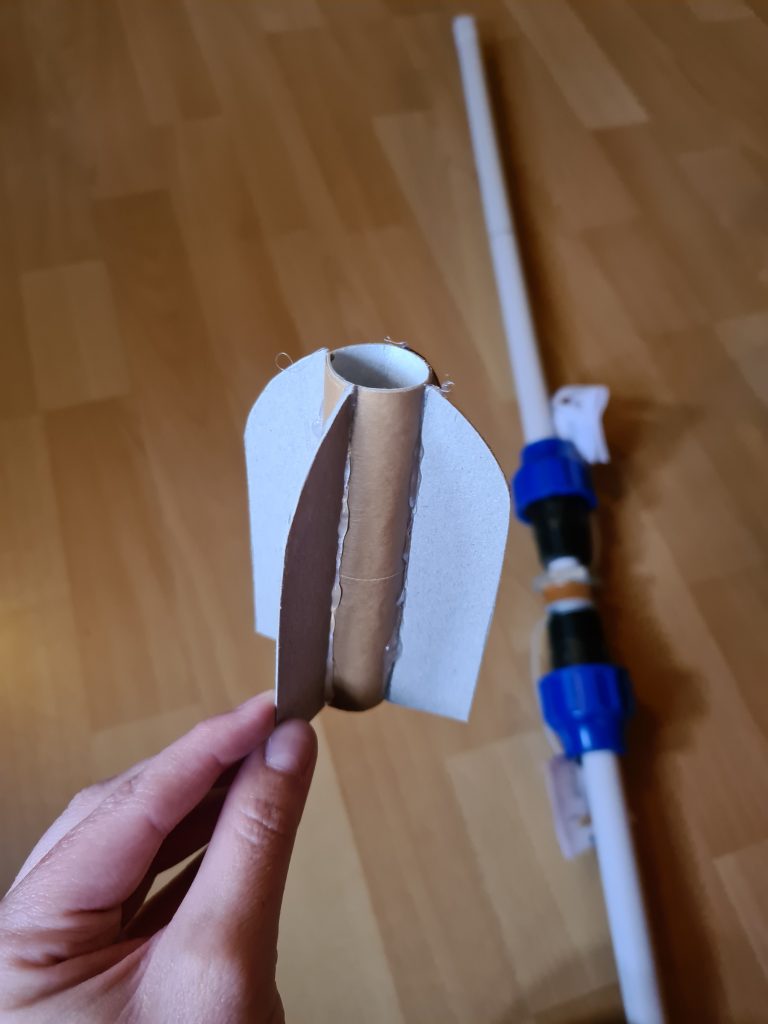
Once I had gathered all the pieces and put them on the base to see how they looked, I marked the spots for each piece and started glueing everything together. Not everything fit perfectly and I used duct tape to make the base a little thicker in these places before I used my glue gun to secure everything. There is one part of Rey’s staff that looks like three buttons, which I cut out of a plastic wrapping I had lying around.
Adding the Paint
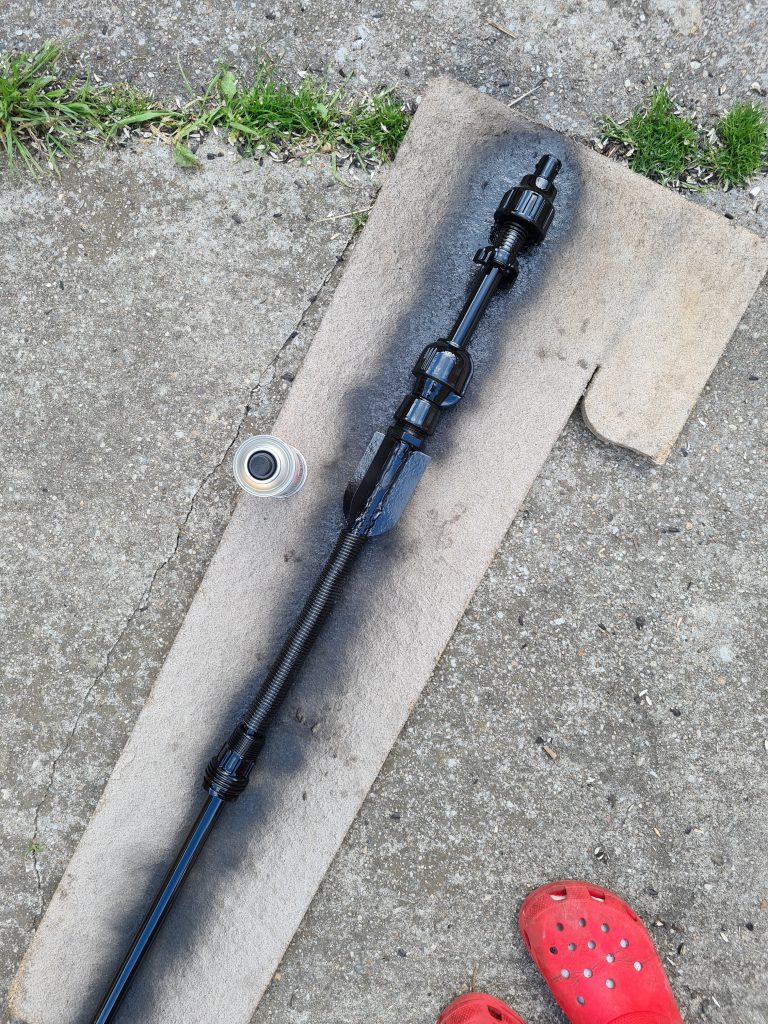
When everything had dried and I was sure it would stay in place, I took Rey’s staff outside to spray paint everything black. It’s really important that you do this outside or in a well-ventilated area because the fumes are bad. It took my staff a day to dry before I could repeat the procedure on the other side. On the third day, I checked for spots I had missed and re-did the spray paint in those areas. I used the entire spray can on this project.
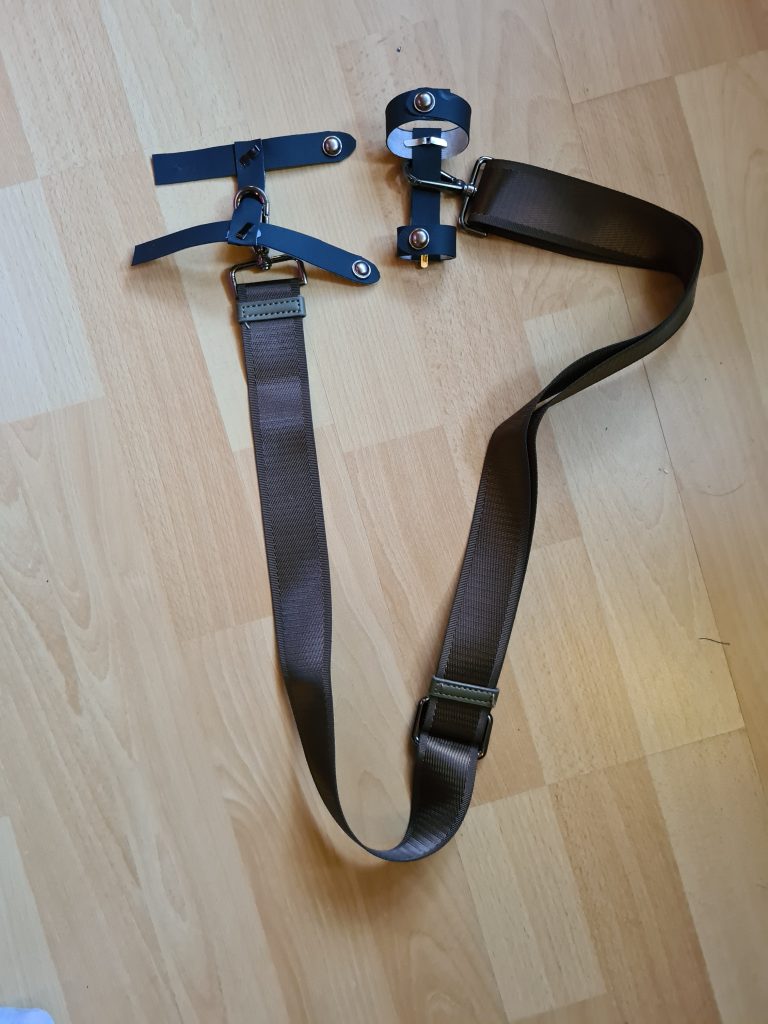
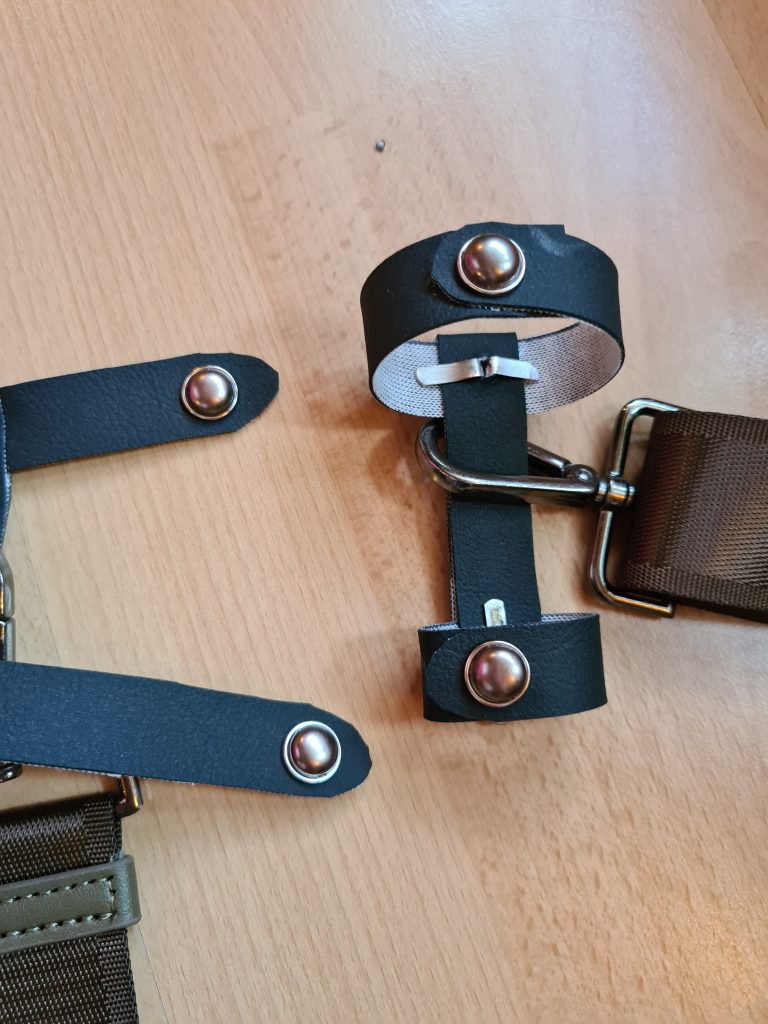
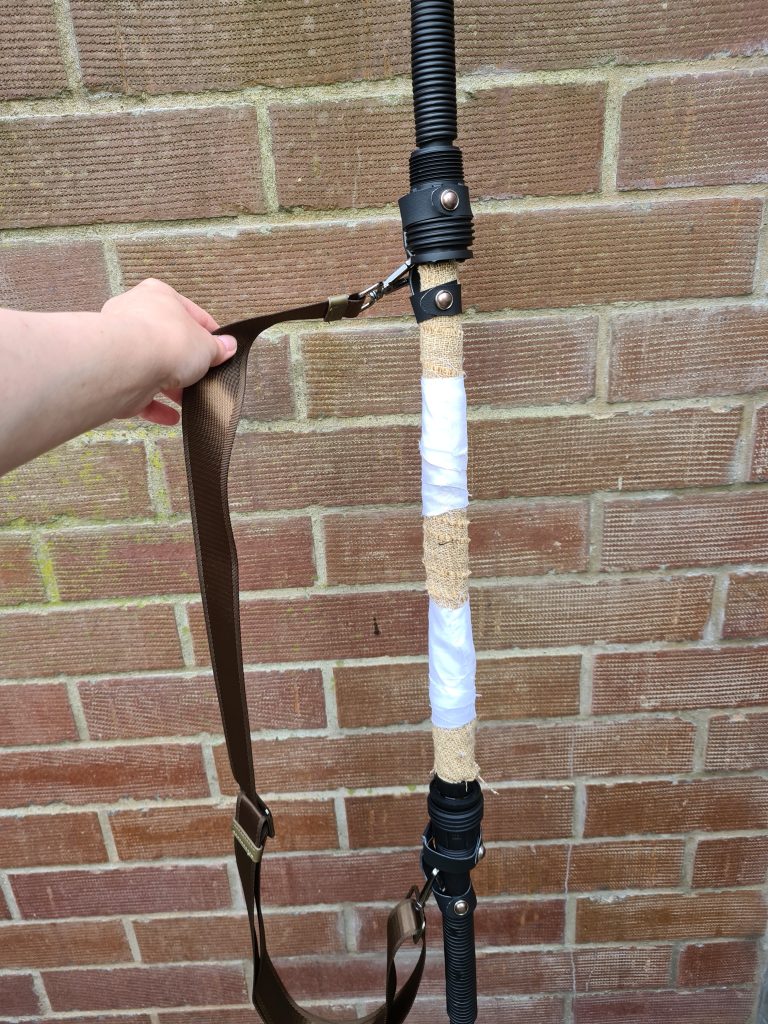
I got the strap on Amazon by searching for a laptop bag strap and I attached it to the staff by cutting out a few pieces of leftover faux leather and securing those with brass fasteners. I didn’t trust them entirely, so I glued them in place with my glue gun, too. Once the strap was attached, I used some leftover fabric straps and wrapped them around the middle of the staff.
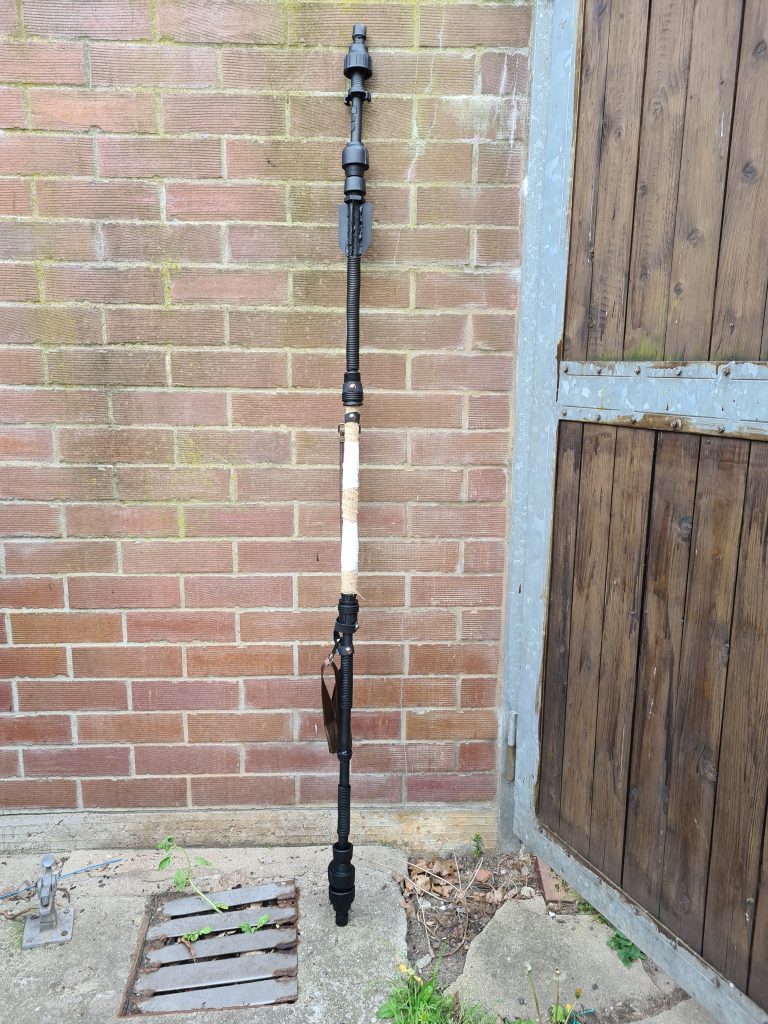
The Finished Rey Staff
I wasn’t in a hurry to finish Rey’s staff because I still had a different sewing project to work on at the time and I was waiting for Rey’s fabric to arrive anyway, so I spread it out over the course of 2-3 weeks. In total, making Rey’s staff took me about 4 hours and cost me 45 Euros. You can probably make one much cheaper if you do have many of these items lying around at your home, but I don’t really stock a lot of gardening utensils apart from the ones I need, so I had to buy 99% of the materials, especially for this project. Still, it’s not difficult to make your own Rey staff and you don’t need any particular skills for it. I know many people managed to make theirs a lot more screen accurate, but I’m always trying to stay as cost-efficient as possible while making my cosplays, so what I ended up with is enough for me. It certainly looks good enough in photos.