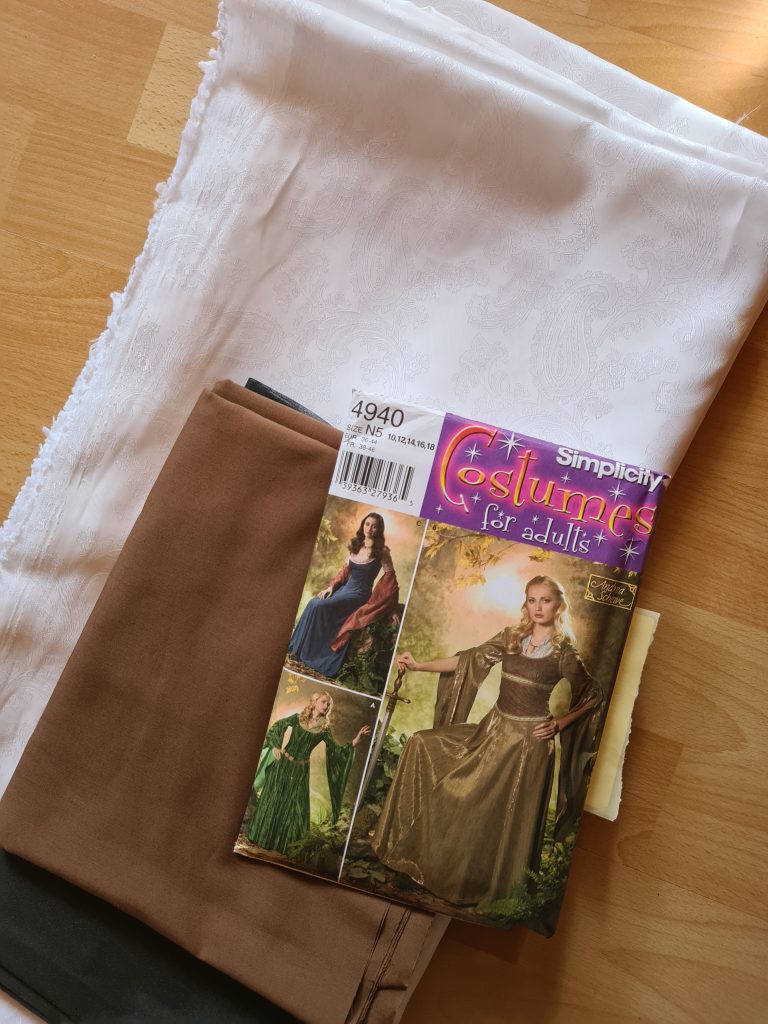
Commercial Pattern: Simplicity 4940
Working Time Dress: 10.5 Hours
Working Time Corset: 7.5 Hours
Working Time Total: 18 Hours
Materials:
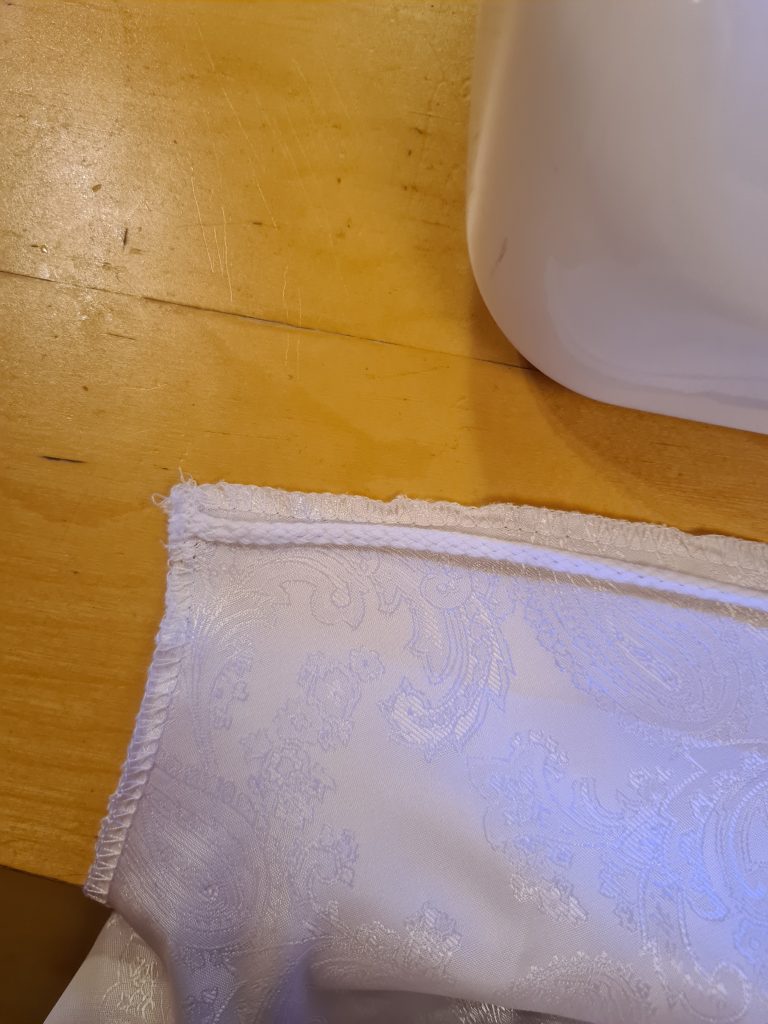
Jacquard Fabric, White, 8m
Cotton Fabric, Brown, 1.5m
Cotton String, White, 4m
Lurex Trim, 7m
Interfacing, Black, 1m
Accessories:
Blonde Wig (from Wish), 30 Euros
Cost Total: 142 Euros
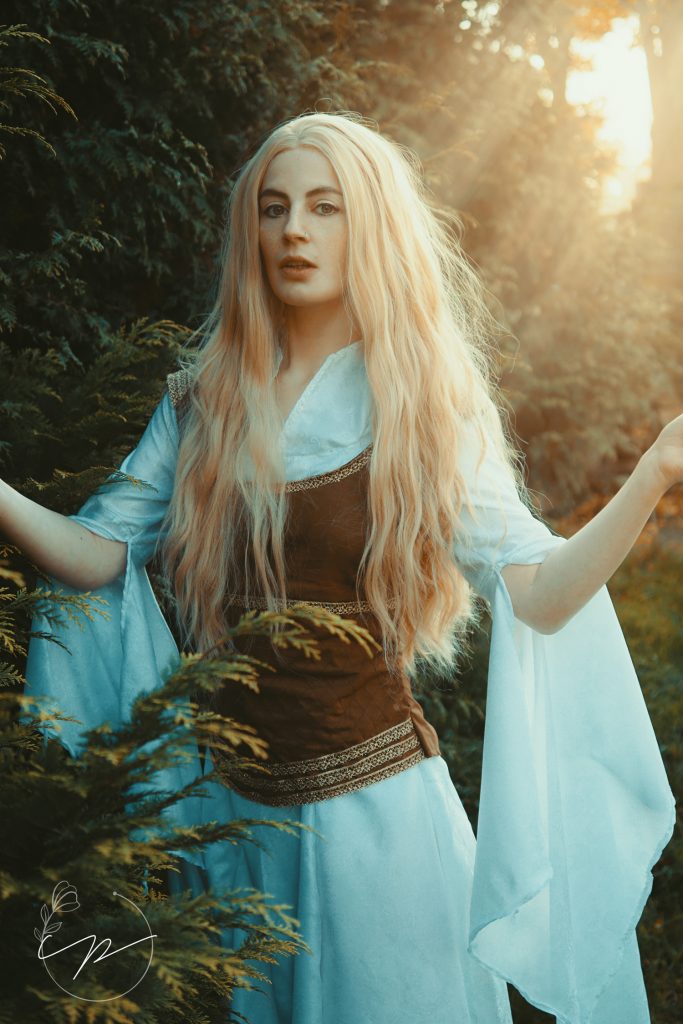
Planning My Eowyn Shieldmaiden Cosplay
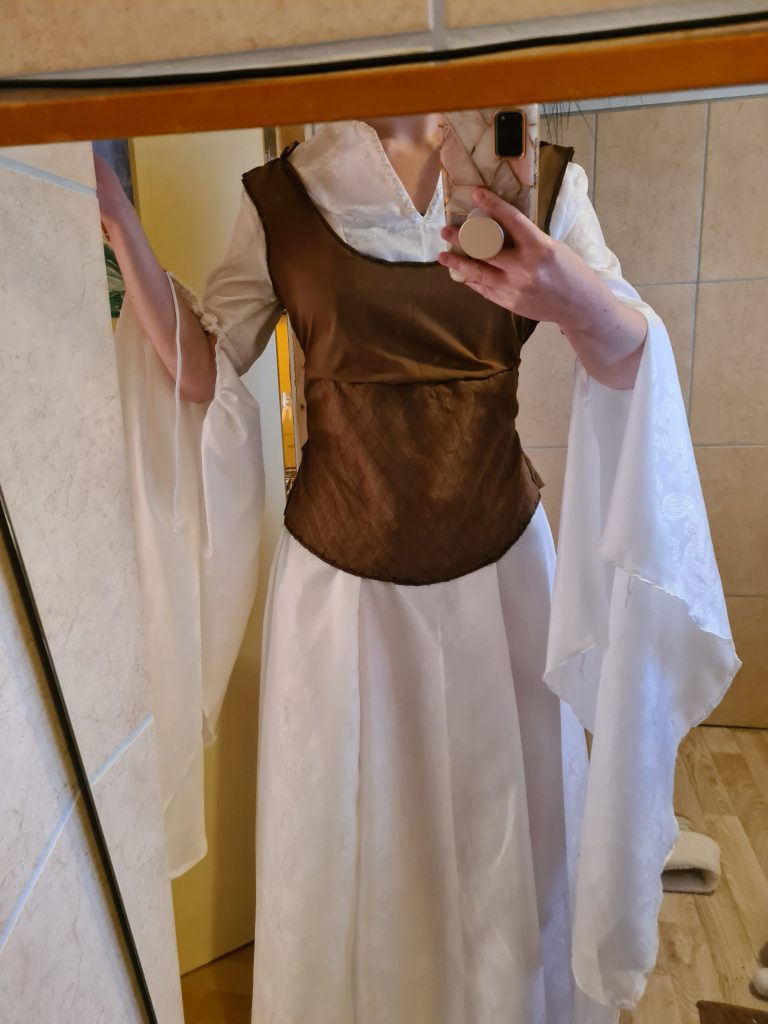
I’ve been fond of this character since my friends first got me into Lord of the Rings back in 2009 and when I received my first sewing machine, Eowyn’s Shieldmaiden dress was one of the first projects I attempted. Of course, I was an absolute beginner back then and didn’t really know what I was doing, so that dress turned out accordingly, but it’s fun to compare the 2010 dress to the 2020 one and see how much progress I’ve made over the last ten years. Still, I wanted a proper Eowyn cosplay, so I went hunting for a pattern and found one that is meant to recreate her gorgeous Shieldmaiden dress – but more about the pattern later. I also found exactly what I needed in terms of fabric on my favourite fabric websites. Eowyn’s underdress looks plain white when you see it on screen, but I managed to find a couple of HQ character photos of her and you can see that there is a soft, jacquard-looking pattern to the fabric, so that’s what I ended up buying. For the corset, I chose brown cotton and golden lurex trim. Technically, the original looks more like embroidery, but I was too scared to go for that look.
Putting The Dress Together
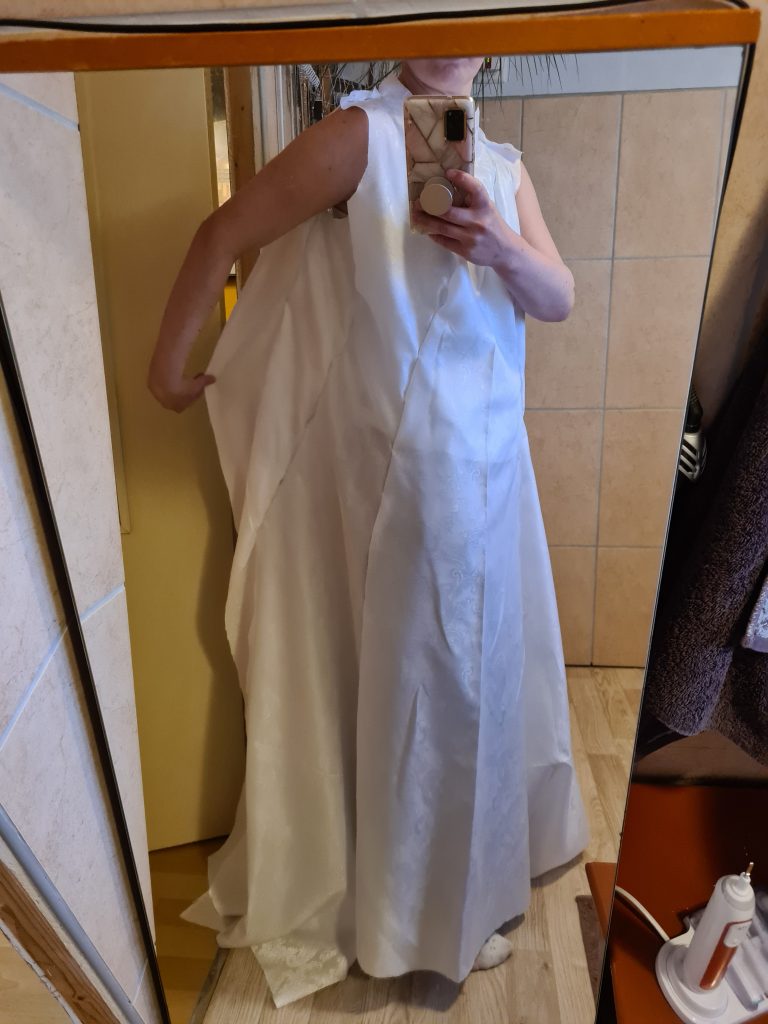
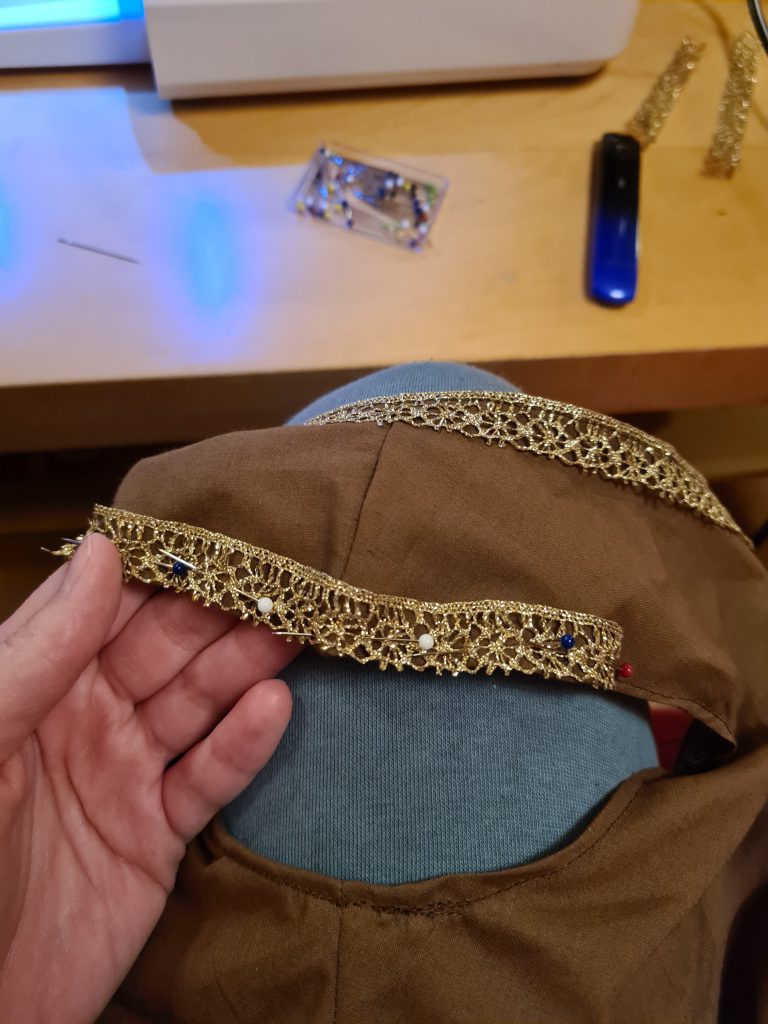
Once I had done a large amount of damage control, I started putting together the base of the dress, but soon hit another hurdle in the shape of the yoke. At first, I couldn’t figure out how it was supposed to work because it didn’t seem to look right until I glanced at the pattern sleeve once again and realised that it was set a lot higher than Eowyn’s original Shieldmaiden dress. So I did some damage control in that area, too, and adjusted it to sit a little lower than originally intended. The area of Eowyn’s collar is also beautifully stitched with golden thread – which I tried to recreate. I could only get one row done because my sewing machine hated the gold thread and sounded like it was going to explode into my face at any given moment, so I decided that a little of it would do. After all, it’s not really visible unless you open an HQ movie still.
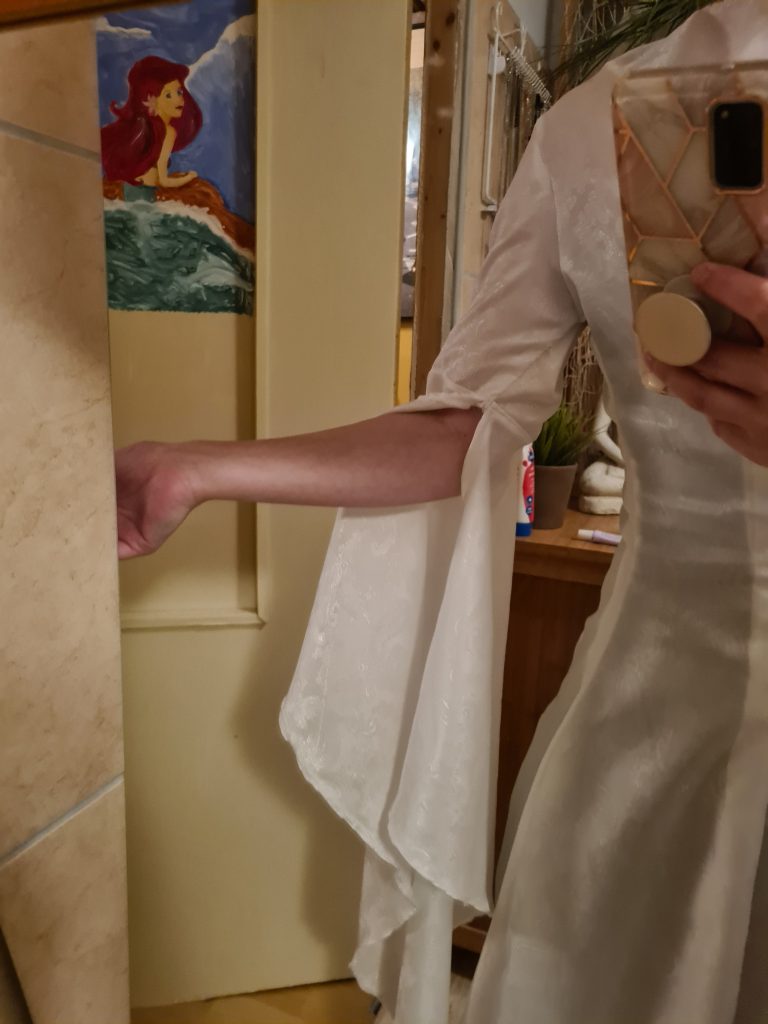
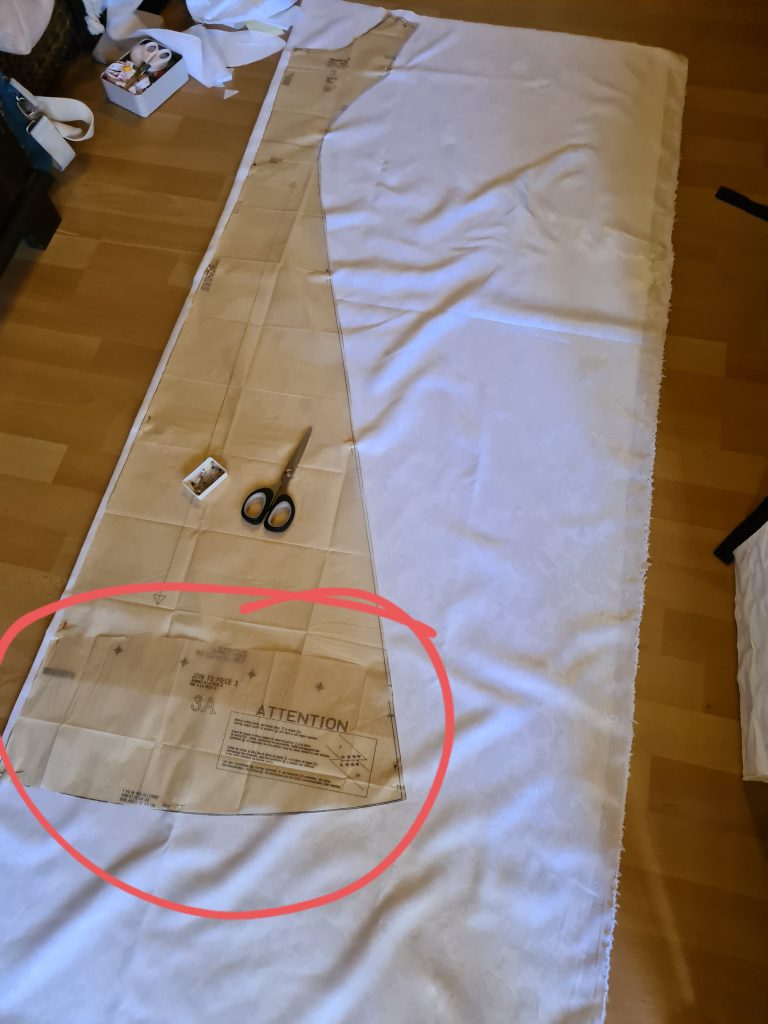
When I got to the sleeves, I found the first part of this entire costume that was actually easy, so they were finished and attached to the dress in almost no time at all. In total, the dress took 10,5 hours to make. It would have been a lot quicker with a better fitting pattern because I think I spent nearly 5 hours just doing damage control and making sure it was the right size for my body. I’ve had bad sewing patterns before and I’ve had easy ones – and the Eowyn dress pattern is easily the most annoying one I’ve ever worked with. Once the dress was finished, I found that I couldn’t properly enjoy my success at first because of all the hassle I’d had with it. Luckily, over time, I forgot the struggles and now I can happily wear it, but the process of making it was. Not. Fun. Please, Simplicity, you can do better. And what is even worse, a part of the pattern was MISSING. Yes, that’s right. They couldn’t fit the entire length of the dress on the pattern (which happens occasionally, so the bottom parts are done separately and glued to the rest of the pattern before cutting the fabric), but they forgot to add the bottom part. I searched all pages (are they called pages?) at least 10 times and I couldn’t find it even though, according to the overview, it should have been there. I had to improvise.
Making Eowyn’s Corset
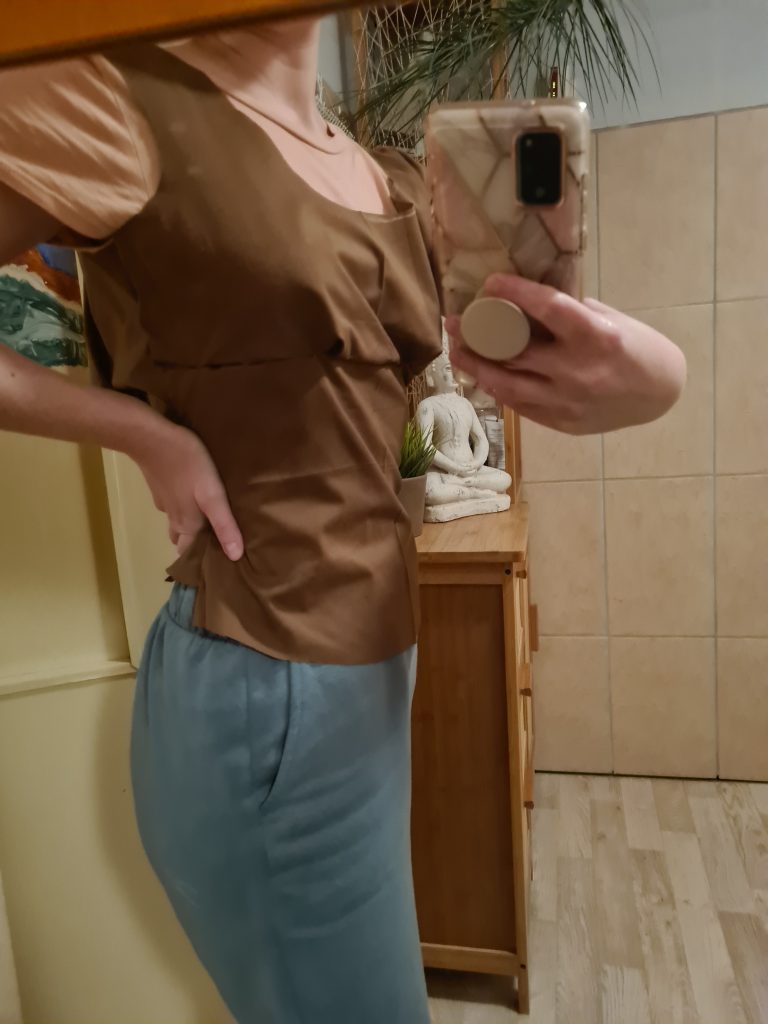
Once the underdress was finished, I immediately moved on to make a corset for Eowyn’s dress. Now, since I remembered the sizing disaster, I cut out a smaller size which still ended up too big (but NOW I know about the 4 inches of wearing ease!). What bothered me most was the strange, puffy area around the chest which, I suppose, leaves enough space for bigger breasts, but since I had measured my chest and eliminated the possibility of boobs, there’s no reason the pattern should be puffy and bunchy there. And thus, the Eowyn Shieldmaiden pattern annoyed me some more. Also, for some unfathomable reason, the back part of the corset was shorter than the front by more than 5 cm??? Luckily, I always order more fabric than I think I need to have the option to fix a mistake, so I just cut out the back again and made it longer. But… seriously? One piece of the pattern missing, another obviously too short? Did I end up with a Monday print?
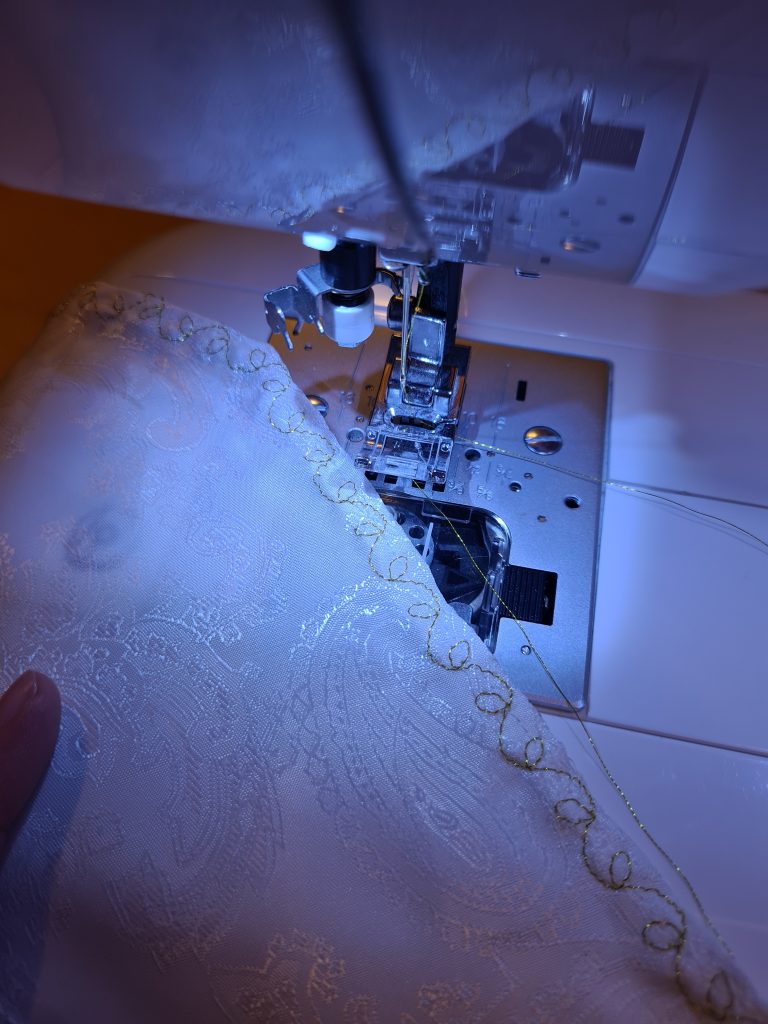
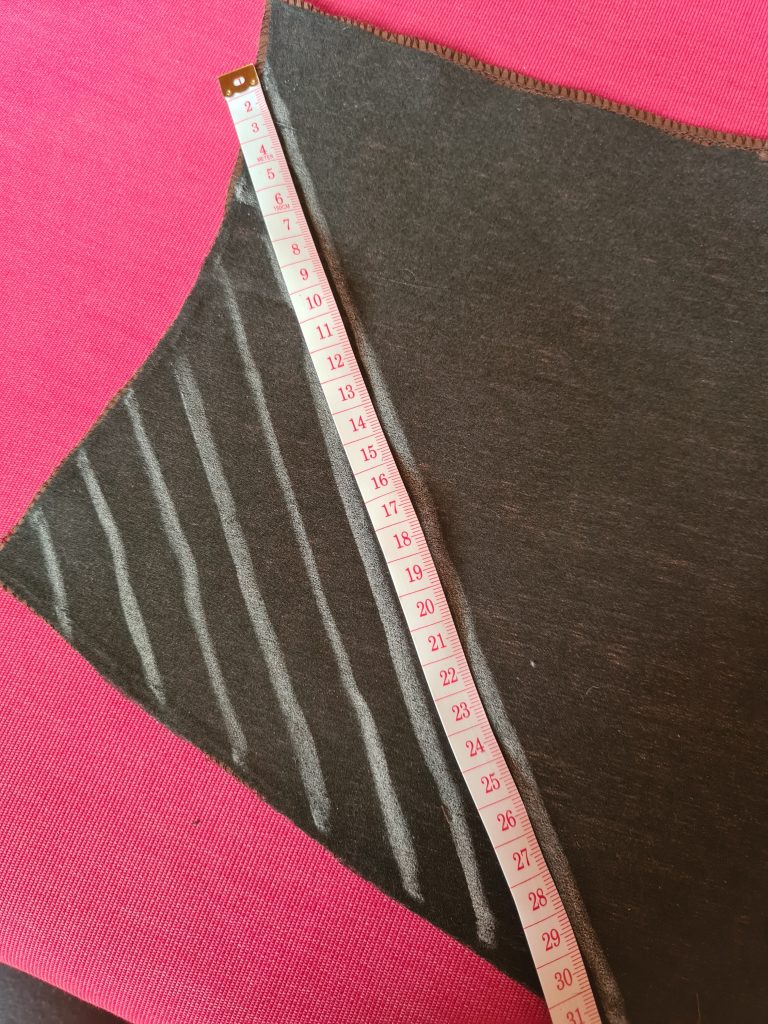
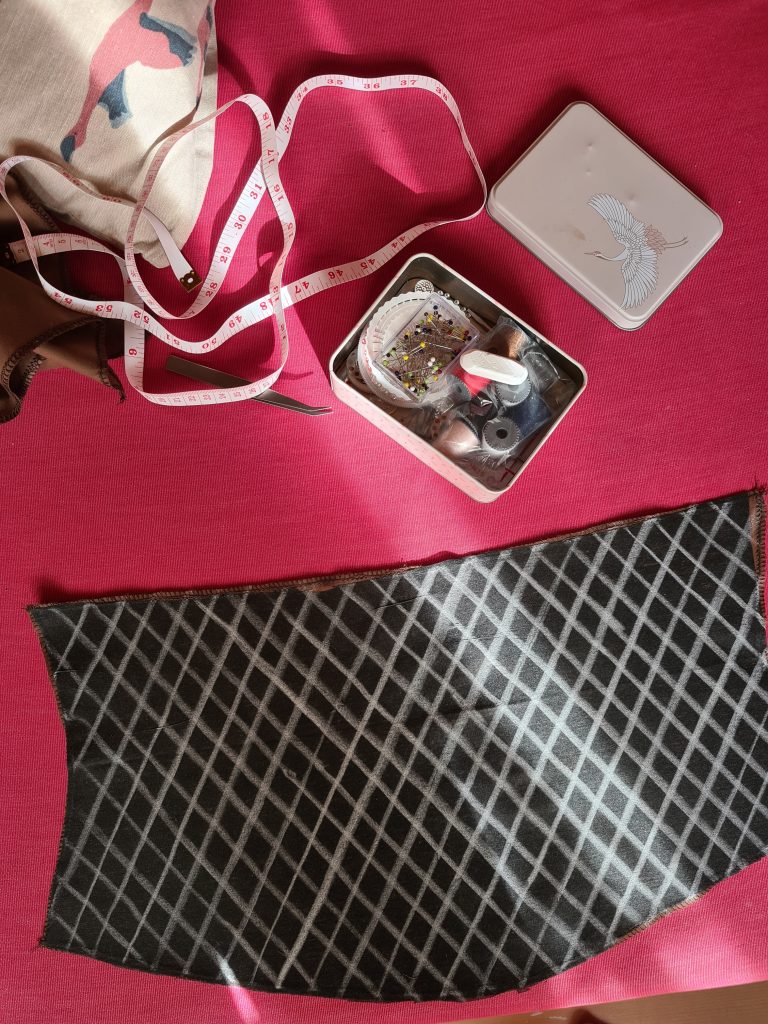
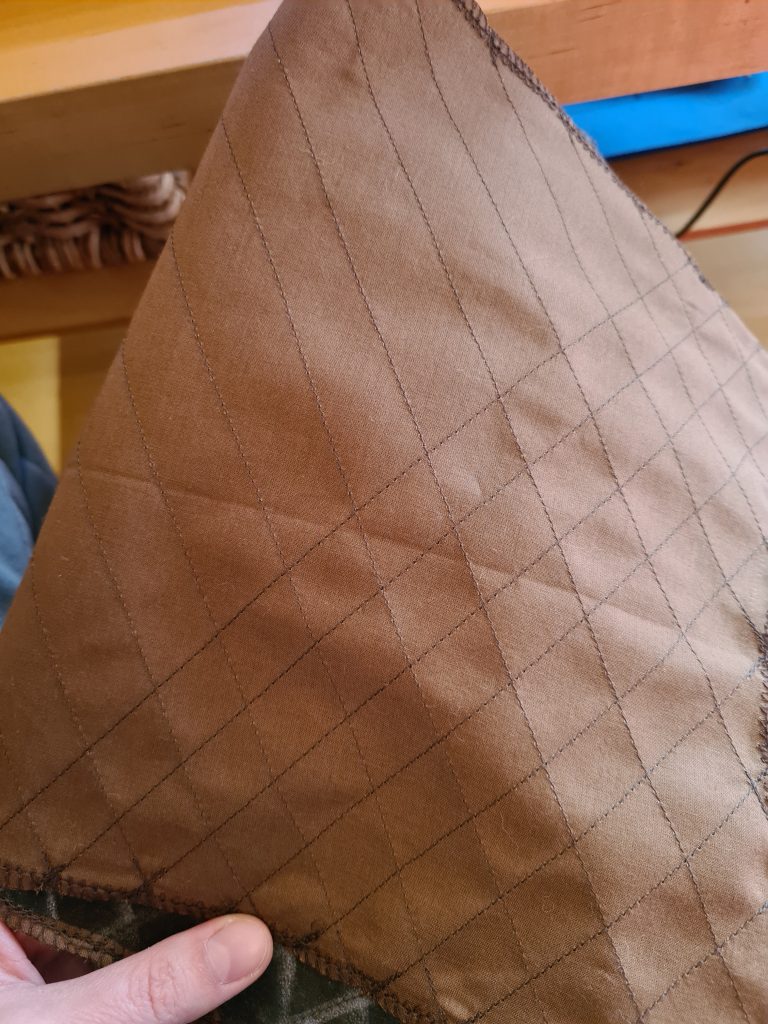
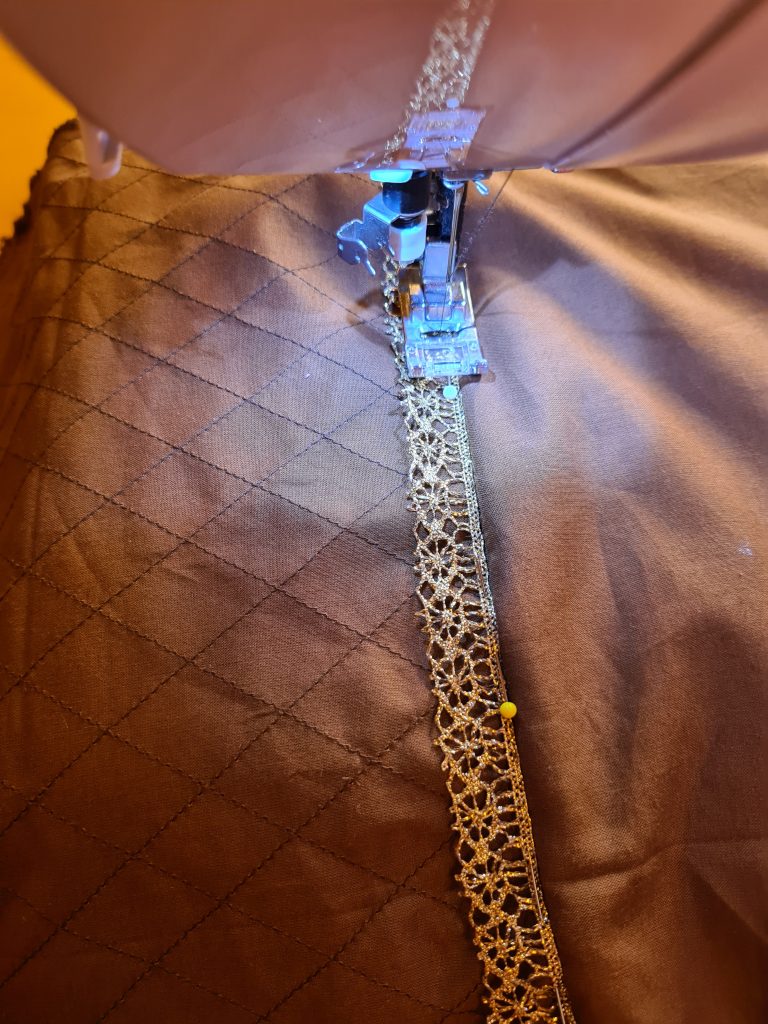
I also cut the lower part of the corset from my interfacing and ironed it to the back of the bottom front part. Because Eowyn’s Shieldmaiden corset is quilted (as you can see in HQ stills) and the original pattern didn’t account for this, I used my measuring tape to figure out the appropriate spacing for where the decorative quilting should go. Then I ran it through my sewing machine. Trust me when I say that this took FOREVER.
Once the bottom part of the corset was finished, I pinned the whole Eowyn corset together and realised it still didn’t fit properly because – I’m sure you’ve guessed – it was too big. I made a few more adjustments, put in the zip and broke out in tears because the worst was finally over. I know Eowyn’s costume didn’t come with a zip and was a lace-up corset instead, but I usually get dressed on my own, so I opted for a zip that can be parted. It turned out to be a very good choice and makes it very easy to get in and out of the corset on your own. If you have a maid, you can do the lace-up back instead.
As mentioned before, the gold on Eowyn’s original Shieldmaiden dress looks like elaborate embroidery which I was way too scared to attempt, so I bought lurex trim instead. I added this to the front of the corset. After sewing the sides together, I also finished the arm area and attached the trim to the shoulders. At last, my Eowyn costume was finished!

A little side note: I bought cotton string to wrap around the upper sleeves, but I conveniently forgot about that during the first photo session. Whoops. Hopefully, I’ll remember it for the next one.
Finishing my Eowyn Cosplay
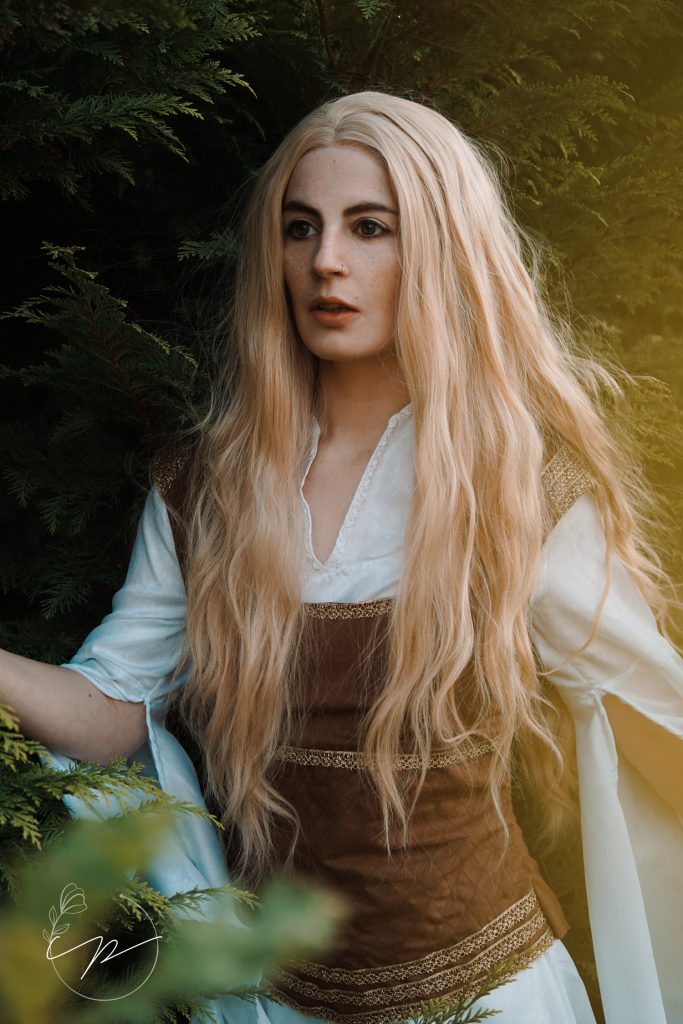
Sewing is a lot of fun for me. It’s one of those activities that require hands and brain and truly helps me forget the world around me, so I love it. Making Eowyn’s Shieldmaiden dress, however, was not just fun and games. I cursed a lot and I almost gave up because the pattern was so horrible. The sizing was a complete disaster, there were parts missing, nothing aligned properly and I hated it. I hated some parts of this process so much that I couldn’t even properly enjoy the finished product at first – though I’m slowly beginning to forget the struggle and appreciate that it turned out so well in the end. A lot of people have messaged me on Instagram, trying to reassure me that it looks good and I know it does, but that doesn’t erase the 18 horrible hours I spent making it. Maybe in a couple of months, I’ll finally get over it and take the Eowyn cosplay out for another photo session. If you’re reading this because you want to make your own Eowyn Shieldmaiden dress, don’t get scared. The pattern is still relatively simple and if you keep in mind what I told you about sizing, I’m sure you’ll have a much smoother process than I did. Just make sure not to listen to the sizing guide and it will be fine.